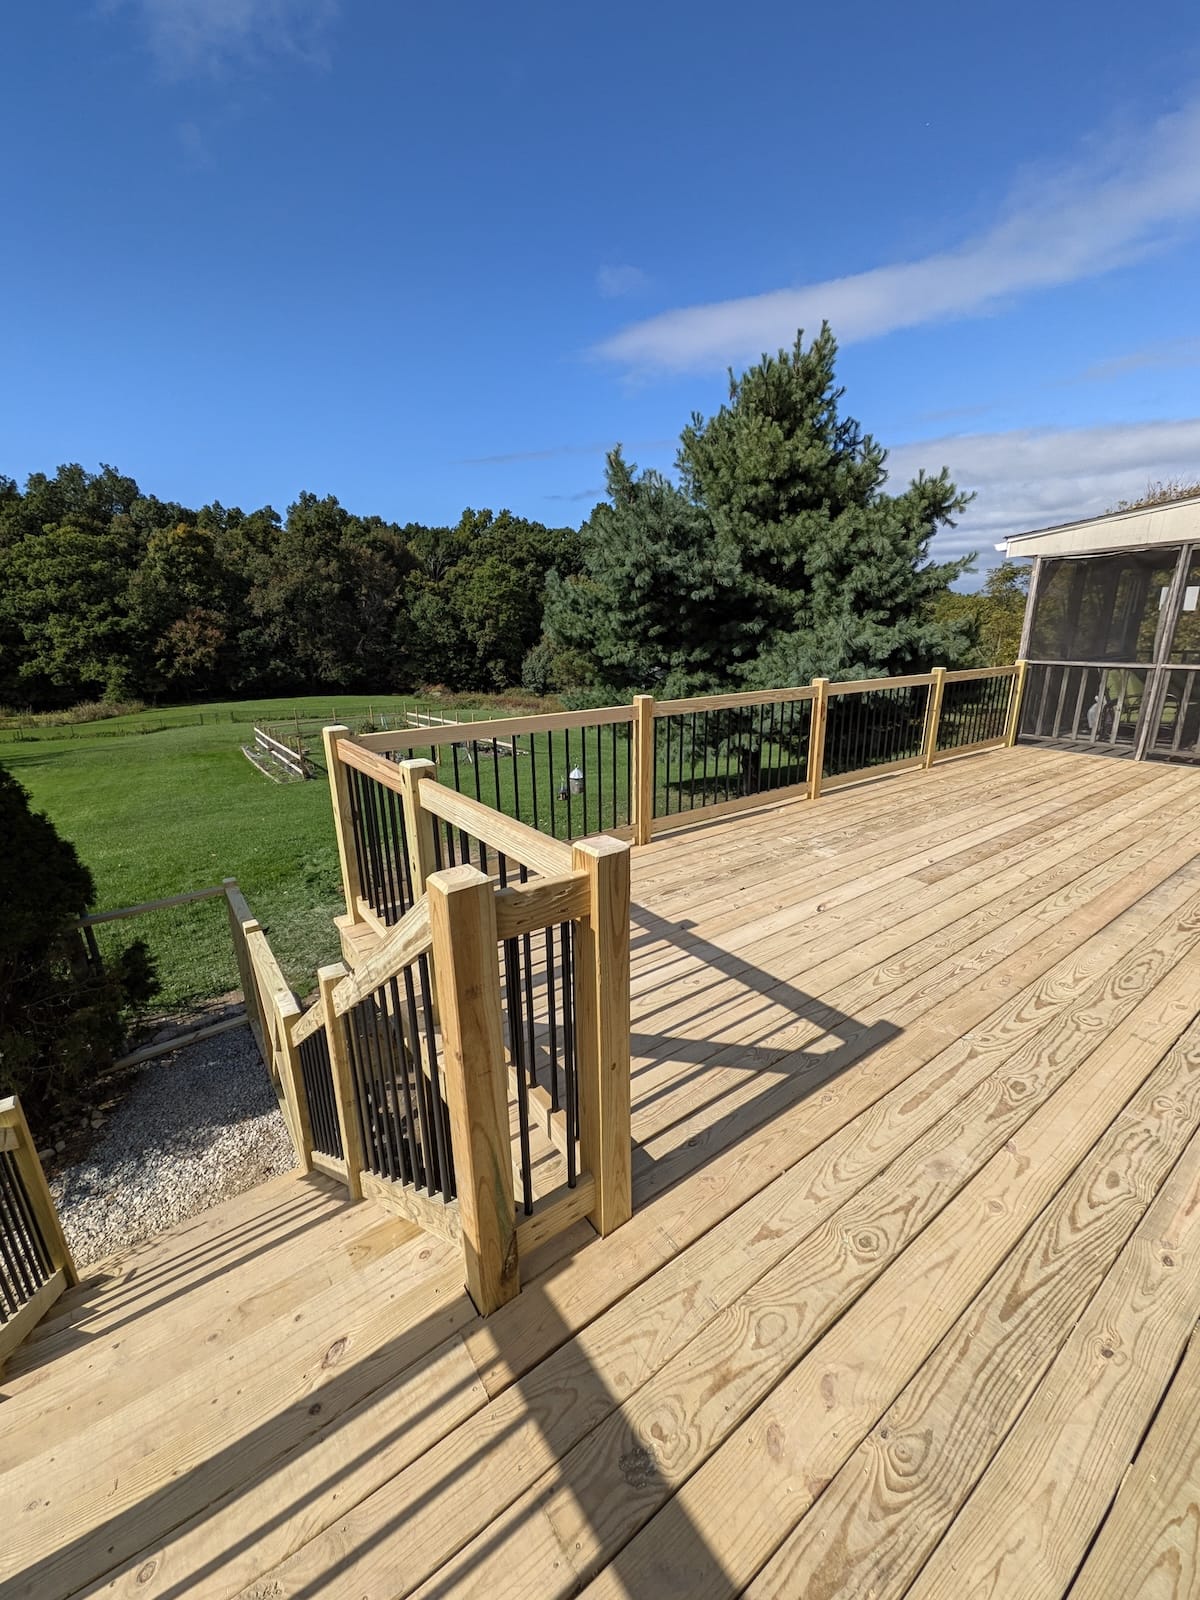
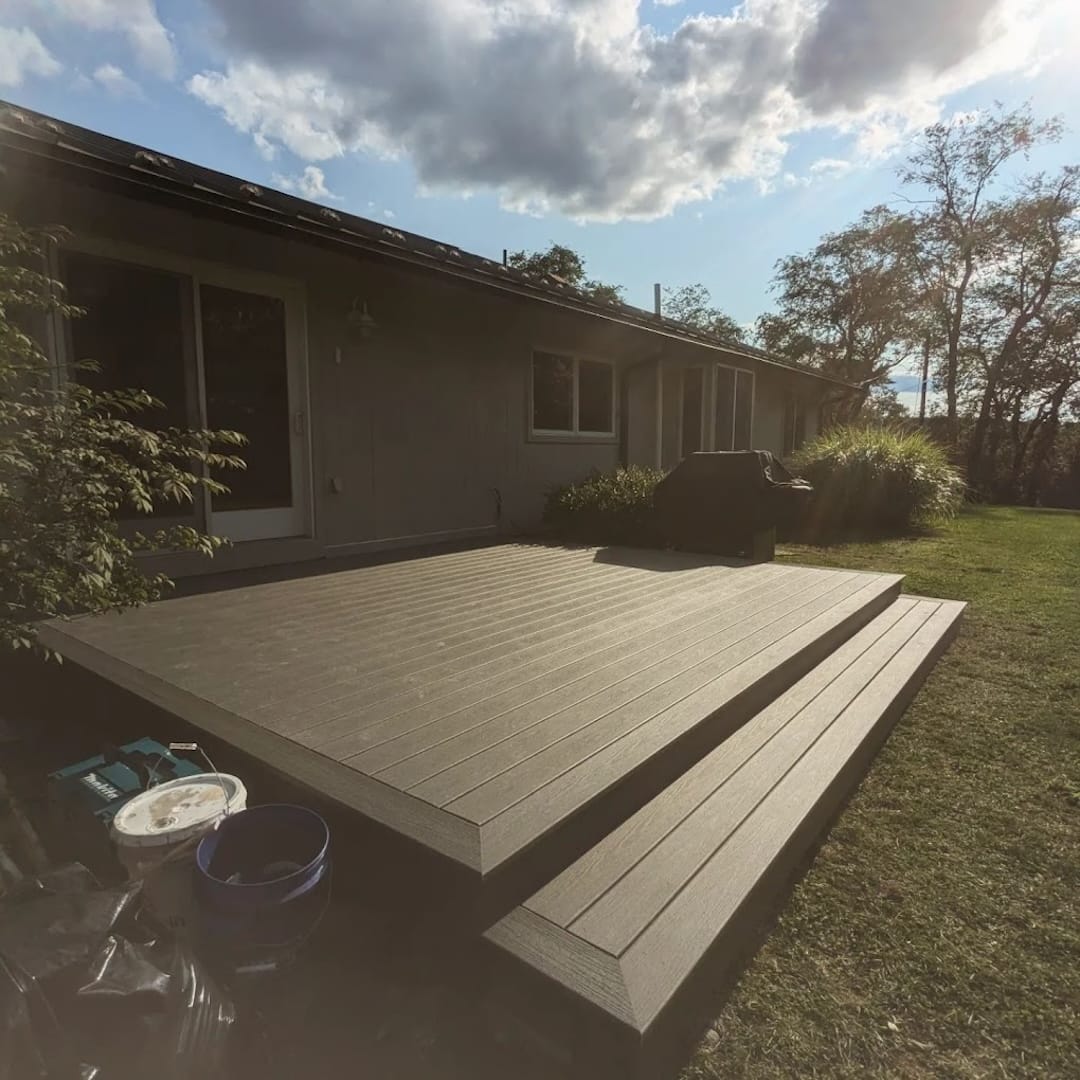
Check out this budget deck rebuild completed this summer in Westtown, NY featuring, demolition of the old deck, new frost-depth footings, a robust framing package, new custom layout, treated decking and a modern wood railing with aluminum balusters.
A Fresh Start for an Elevated Backyard Deck in Westtown, NY
This project began with a failing 30' x 20' deck that no longer gave the homeowners the safe, functional outdoor space they needed. After removing the old structure, we built a new 28' x 12' deck at the home’s first-floor level, creating a better connection between the house, screened-in porch, pool, and backyard.
The new deck raised up and built to the same projection as the adjacent porch.
We worked with the Town of Minisink to pull a permit for demolition of the old deck and construction of the new one. The old deck was a very unique build, but the engineering was lacking, with several critical structural issues due to the layout. The previous homeowner had built this deck and lowered it to attach it below the windows of the basement apartment, which was a unique decision, because it meant the main rear entrance required a landing and staircase to get down to the deck. The landing and staircase down to the deck had posts that landed mid-span on their deck and was just resting on the deck surface without a true load path to any beam, support post, or footing. The previous deck design was built with a framing system so that the deck boards could be run perpendicular to the house instead of parallel. This layout made it so that the decking boards would not require a seam, and ran from the ledger out to the rim joist. Not a bad layout option, but unfortunately, it was not executed properly, which left several deck sections improperly supported.
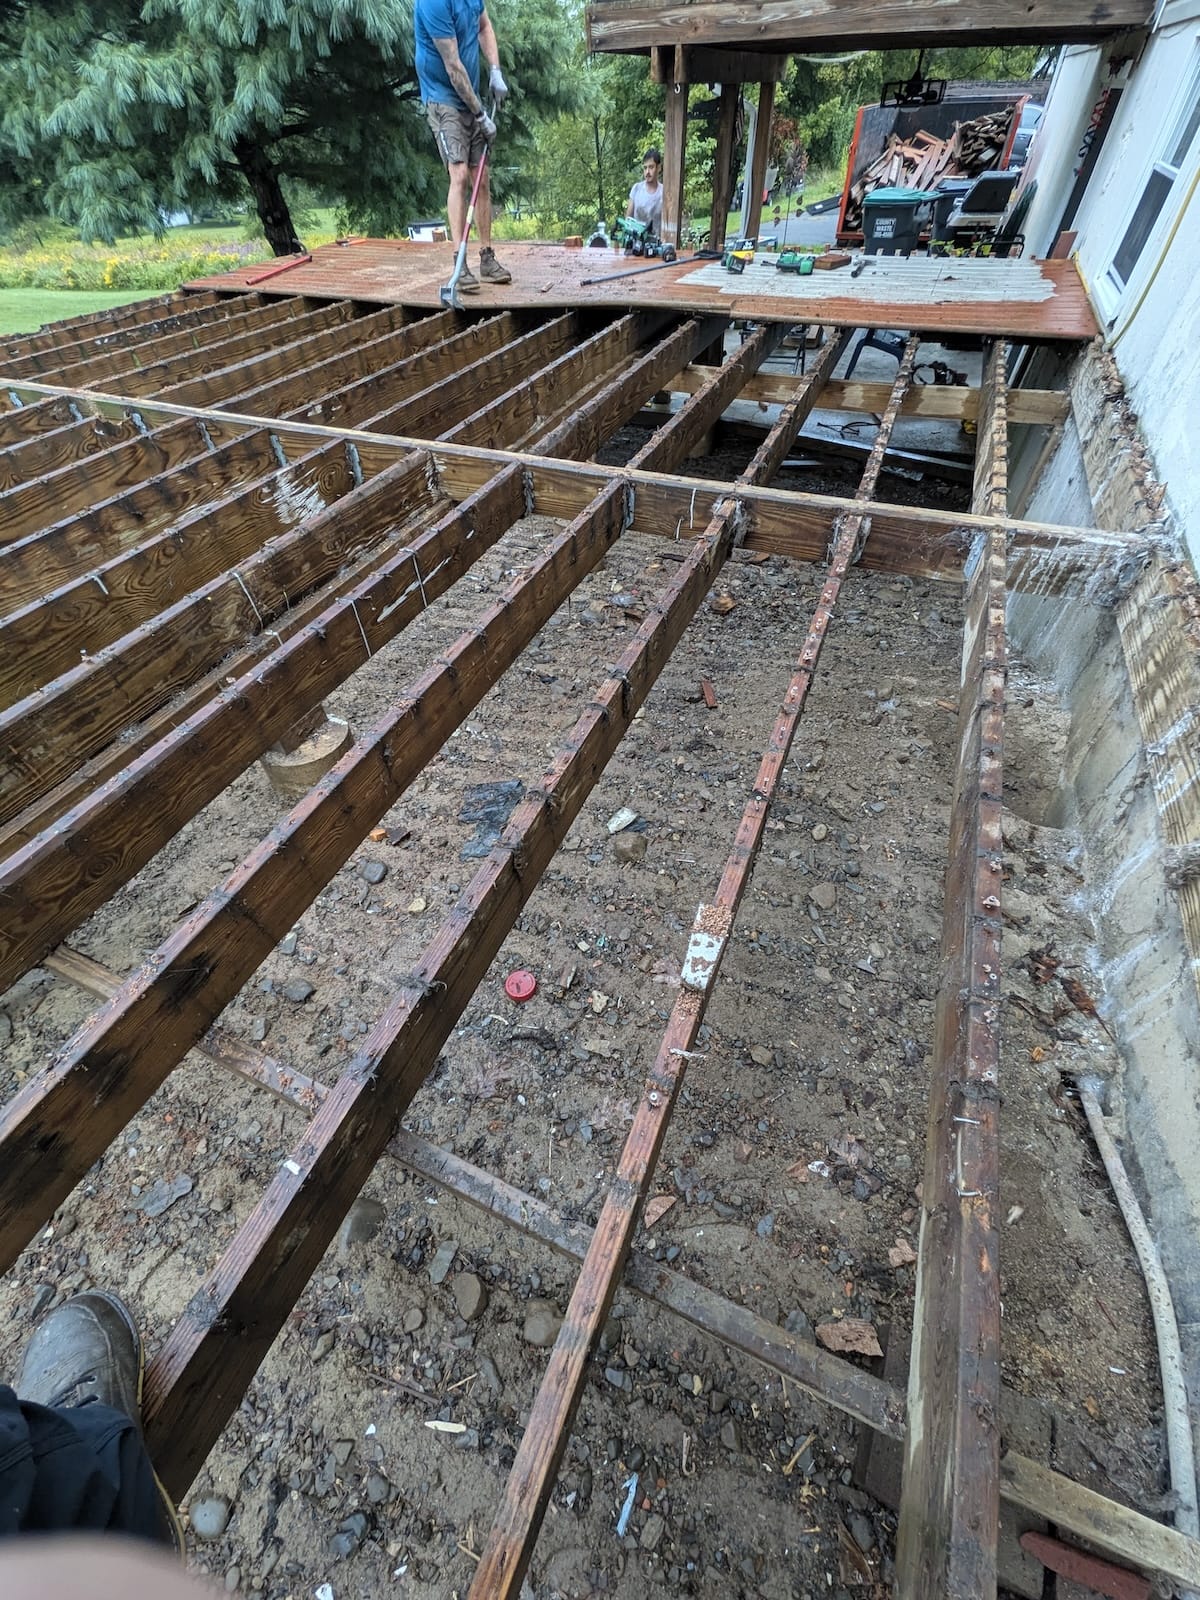
Here's a look at the framing of the old deck once boards were pulled. The main issues were the 2x8s running from the center beam to the band joist were overspan, so they added some a single 2x8 midspan underneath, but that too failed to prevent sagging of the deck.
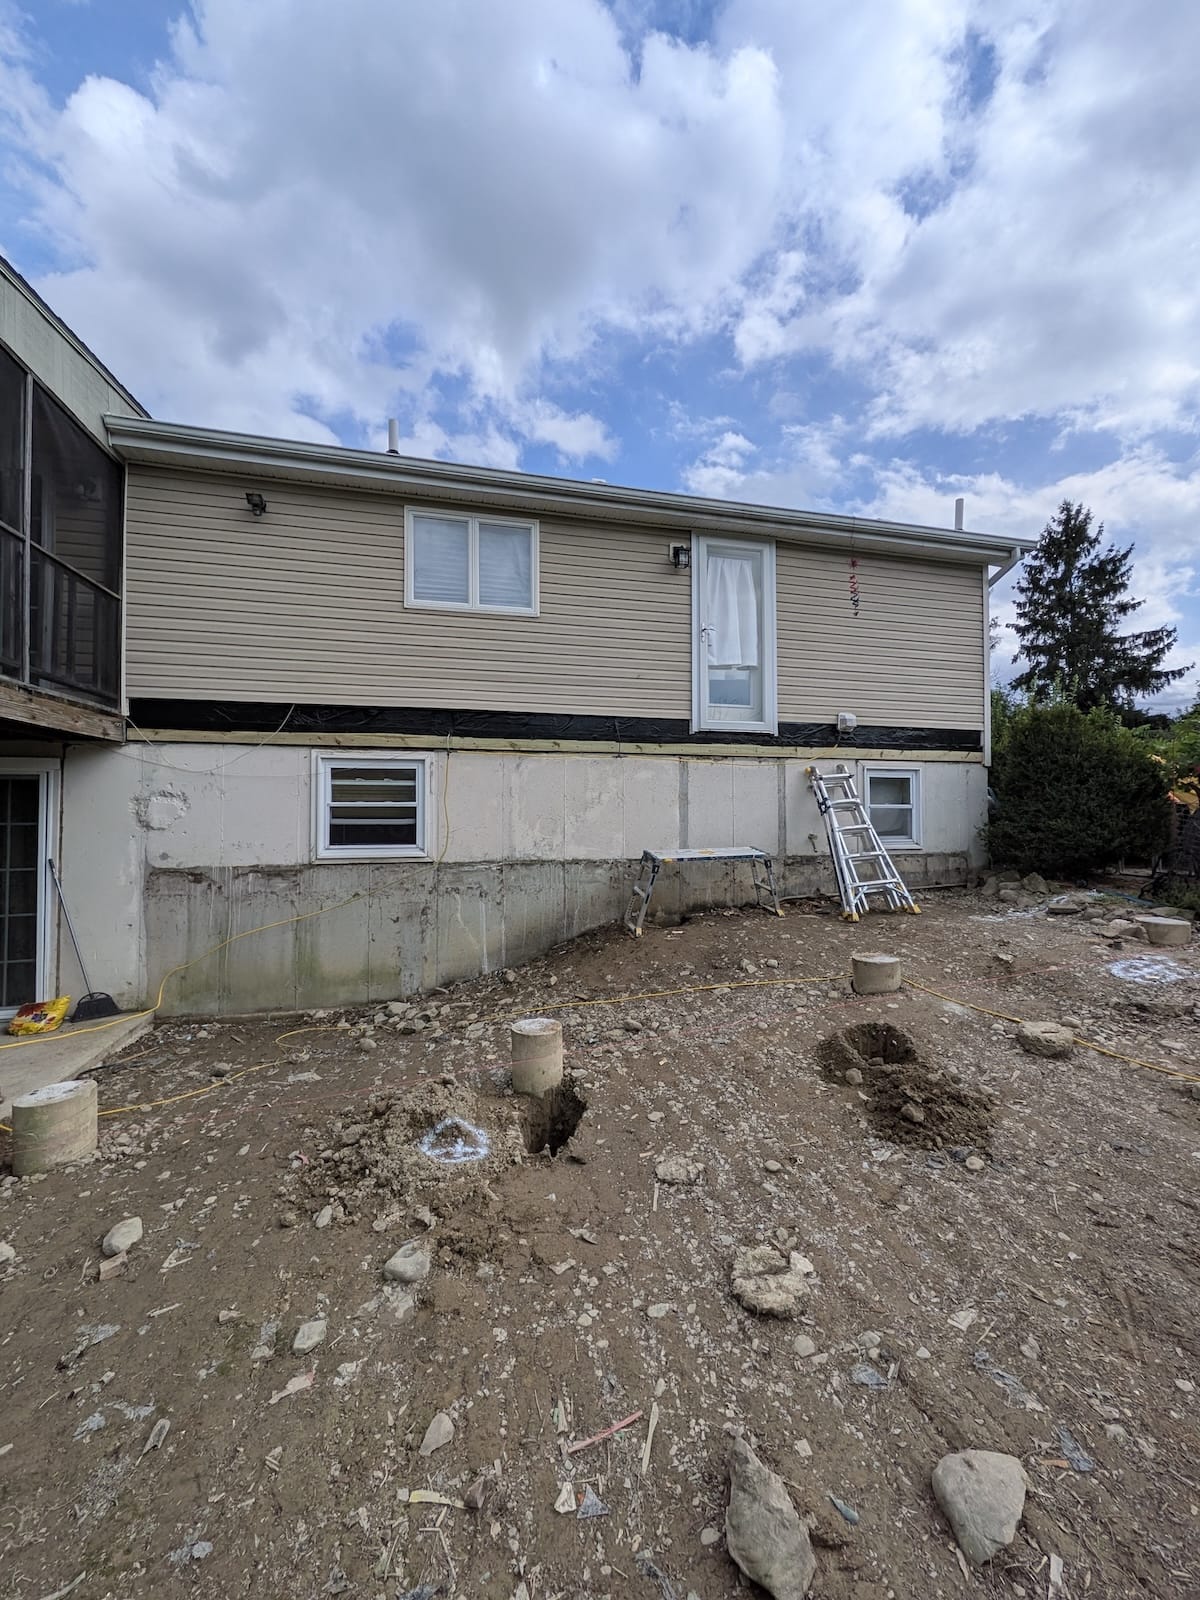
After demolition, we attached the new ledger board to the house rim joist just above the foundation to raise the deck up to the main house level. The door staircase had a ledger attached to it, which was not flashed, so had some rot into the plywood, but it did not extend into the rim joist. We changed out the plywood and removed the vinyl siding to properly flash behind the new ledger before installing.
The new ledger installed with flashing, and testing the depth of the existing footings, which were unfortunately only 24" deep. When looking to reuse footing, we have to test the depth of at least one of the footings by digging along the side of it with a narrow trenching shovel. We have yet to find an existing footing that is the proper depth and/or width for reuse in Orange County, NY so far.
This deck replacement was being done on a budget, so we were hoping to reuse the existing footings. In order to reuse footings, we have to test the depth of at least one of them without disturbing too much of the ground. To do this, we use a narrow trenching shovel to dig along the side of the footing to the required depth, or the bottom of the footing. In this case, we dug 24" and found the bottom of the footing. So we were unable to use the existing footings because they lacked the proper depth and without a bell shaped bottom, they would be undersized for the planned load on the deck.
A quick change order and we moved into laying out the new footings and pouring them that week. Concrete footings require curing time before framing, so we adjusted the schedule to allow the footings to setup before jumping into framing. The benefit of this, is we were able to create our own layout for the deck, including a better staircase location, and extending the deck from 10' to 12'. Overall it worked out better in the end.
We jumped into framing once the concrete setup. To match the existing porch, we modified our usual 2x10 joist design and went with 2x8s at 12" OC to handle the span, while keeping the profile of the deck the same as the existing porch. This deck had 6x6 posts for the main deck section, with a triple 2x10 laminated drop beam. Each Post gets a connector to the beam, and joists get hurricane straps to the beam as well. We add midspan blocking and blocking over the beam, to create a nice sturdy deck frame. Our beam blocking is always one stock size less than the joists so that the beam can "breathe" and we don't create any unnecessary water traps. Due to the height of this deck, we added knee braces to the ends to prevent lateral movement of the deck.
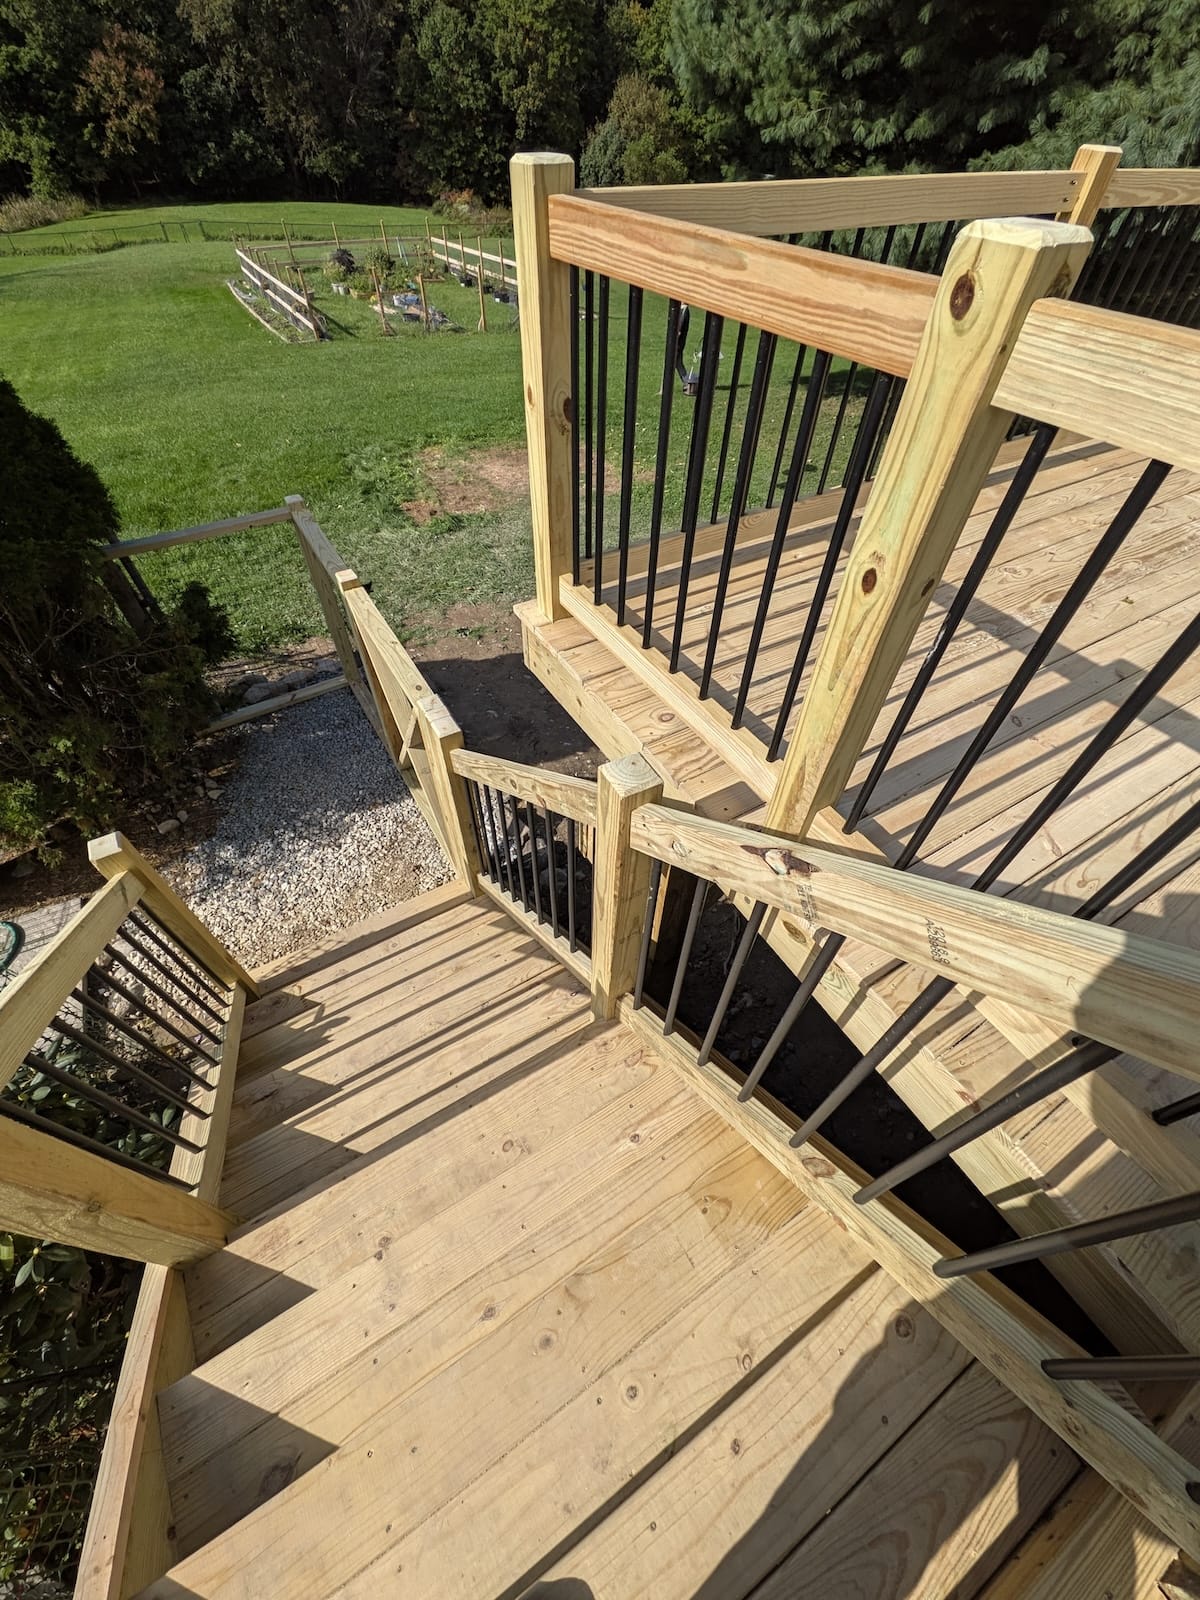
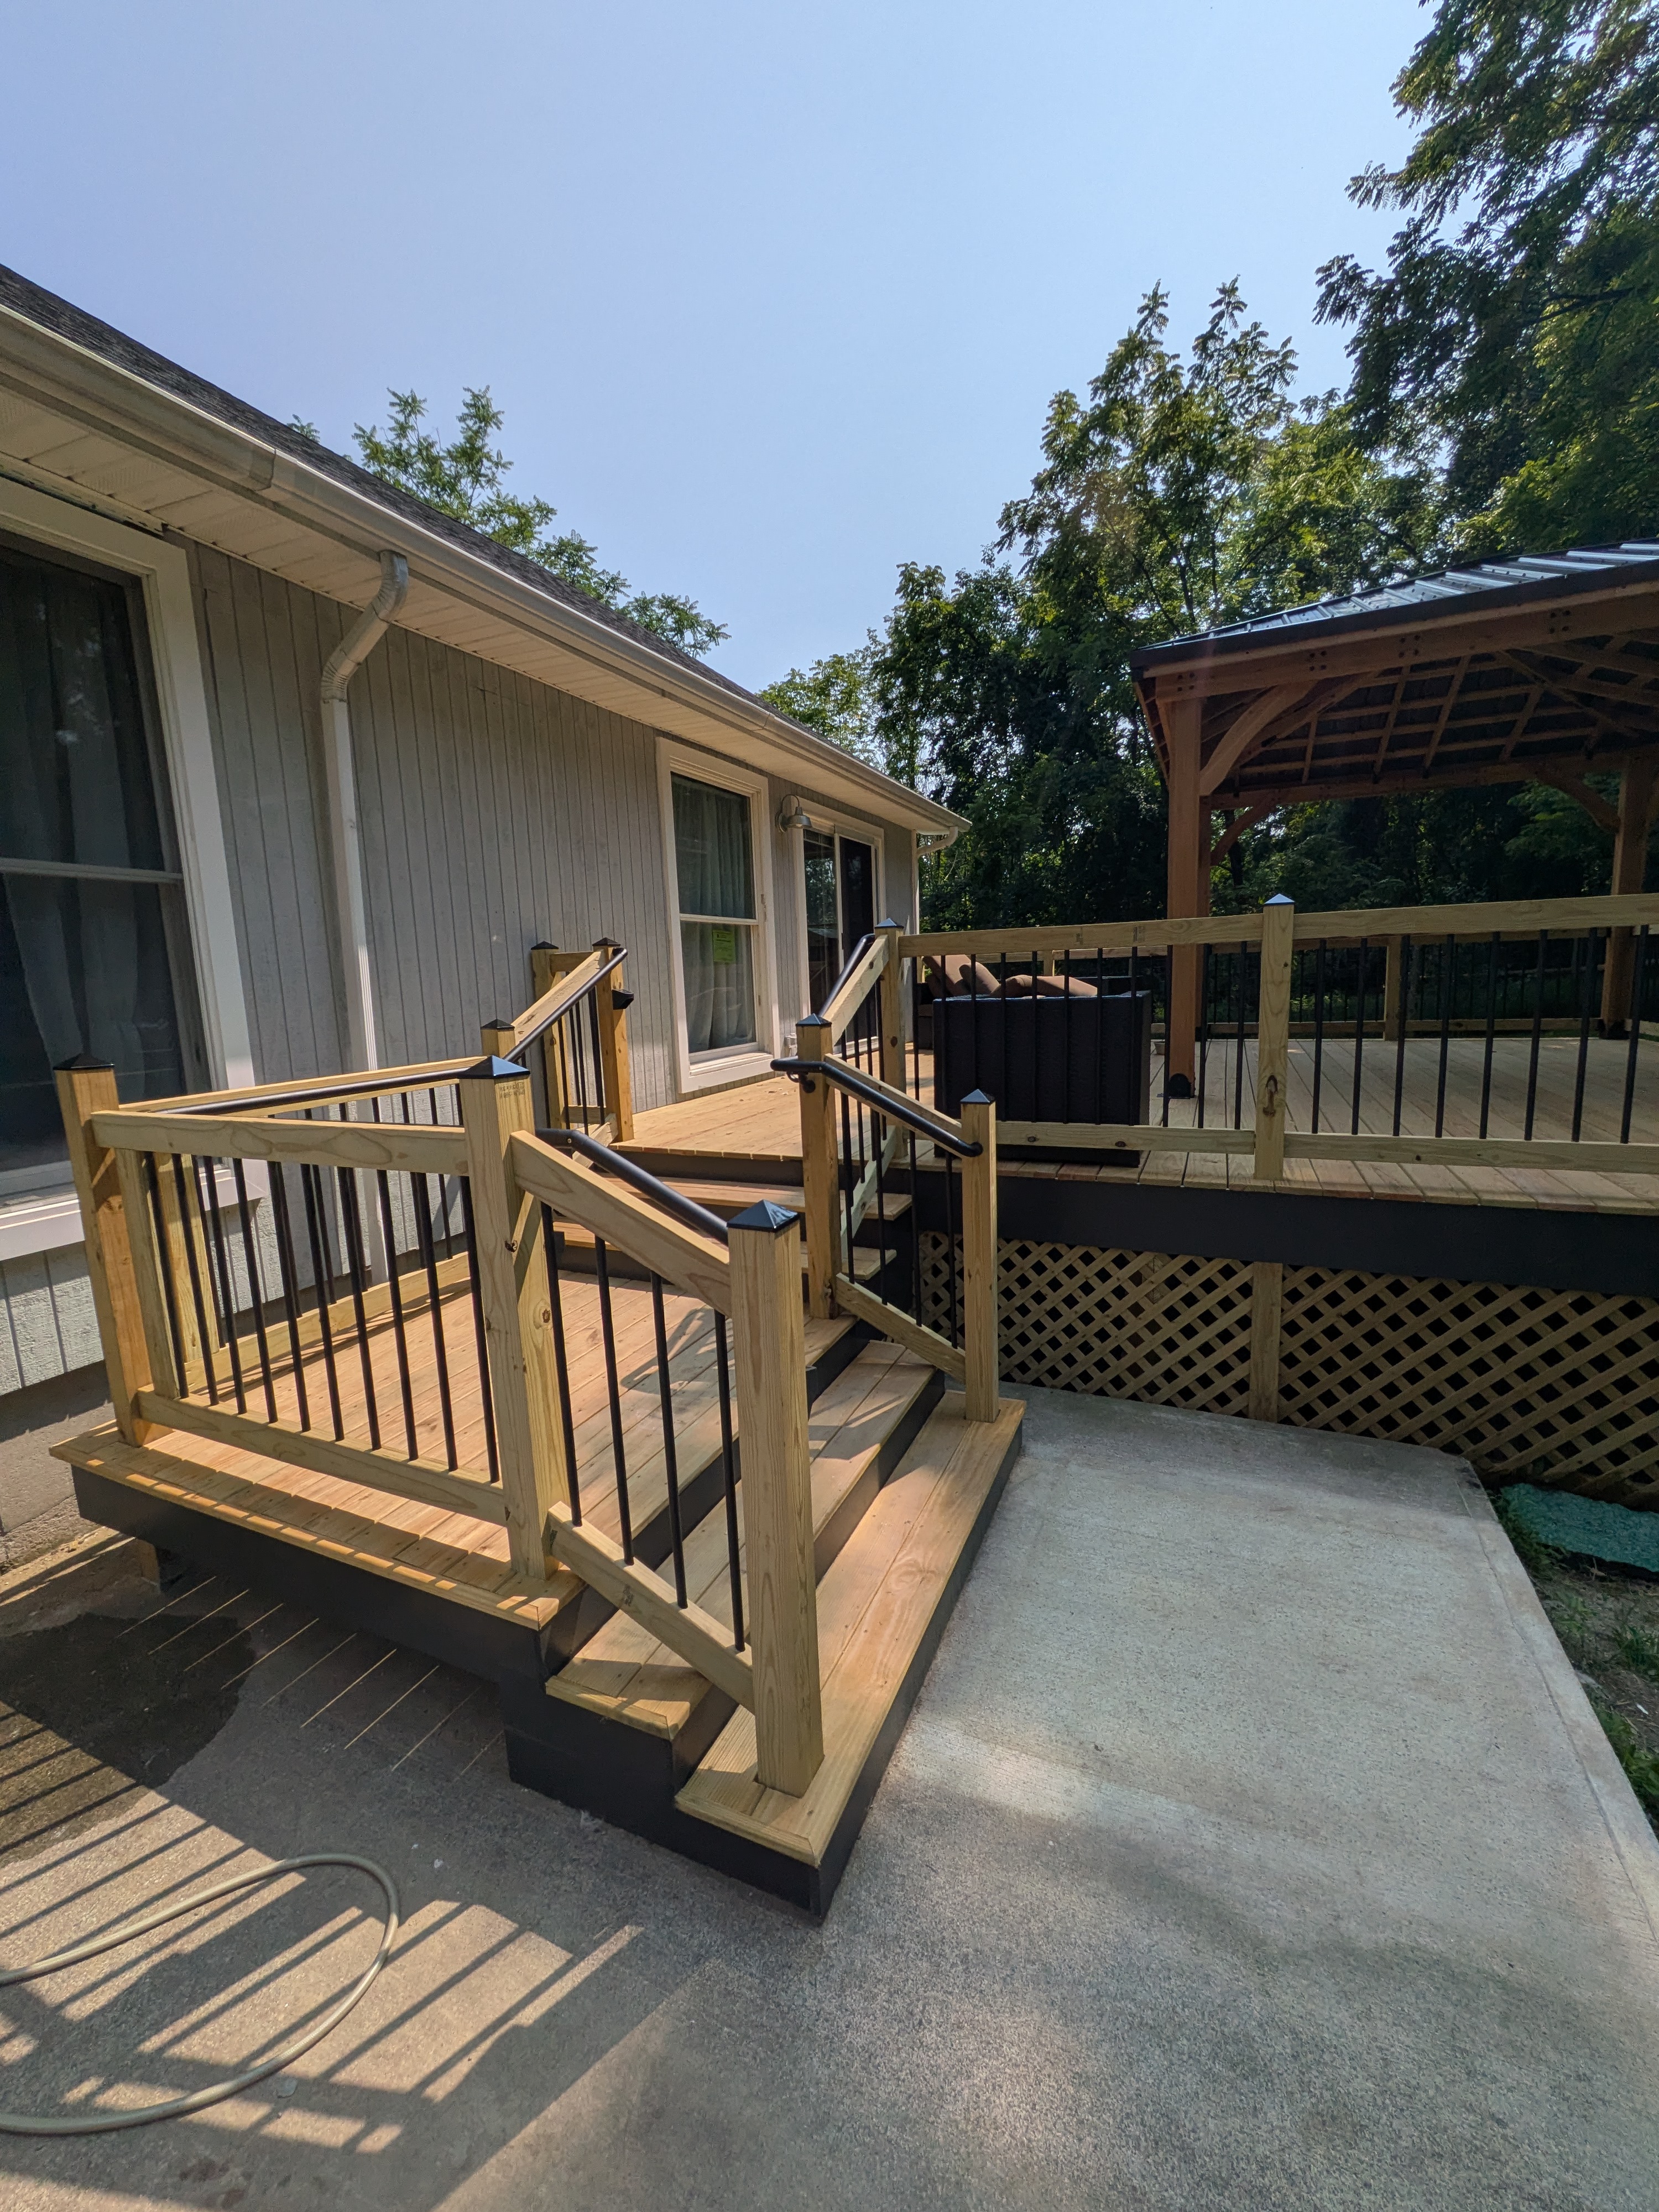
This staircase leads to a fenced in pool area so that the homeowner can let their dogs out without worrying about them getting out. Our stairs are built with custom cut stringers and are sized to your specific deck rise so that they are both comfortable and up to code.
After framing the platform, we moved onto framing the stairs. We had poured a small stringer landing, which gives us a sturdy base to land the stairs, and allowed a gravel path to run up the the staircase. We custom cut all our stair stringers to match the terrain we are working on. This allows us to build staircases that meet code, but also feel comfortable and safe to navigate. We put a lot of attention into staircases. They are a critical part of any deck, so to us they are not an afterthought, they are a critical part of the whole assembly.
We installed Treated Railing with Aluminum Balusters for a more modern look and feel for this deck. These panels allow for easier maintenance since you don't have to stain balusters, just the posts and rails, which makes the job much easier to tackle. The decking used was standard pressure treated, which offers a strong sturdy option on a budget.
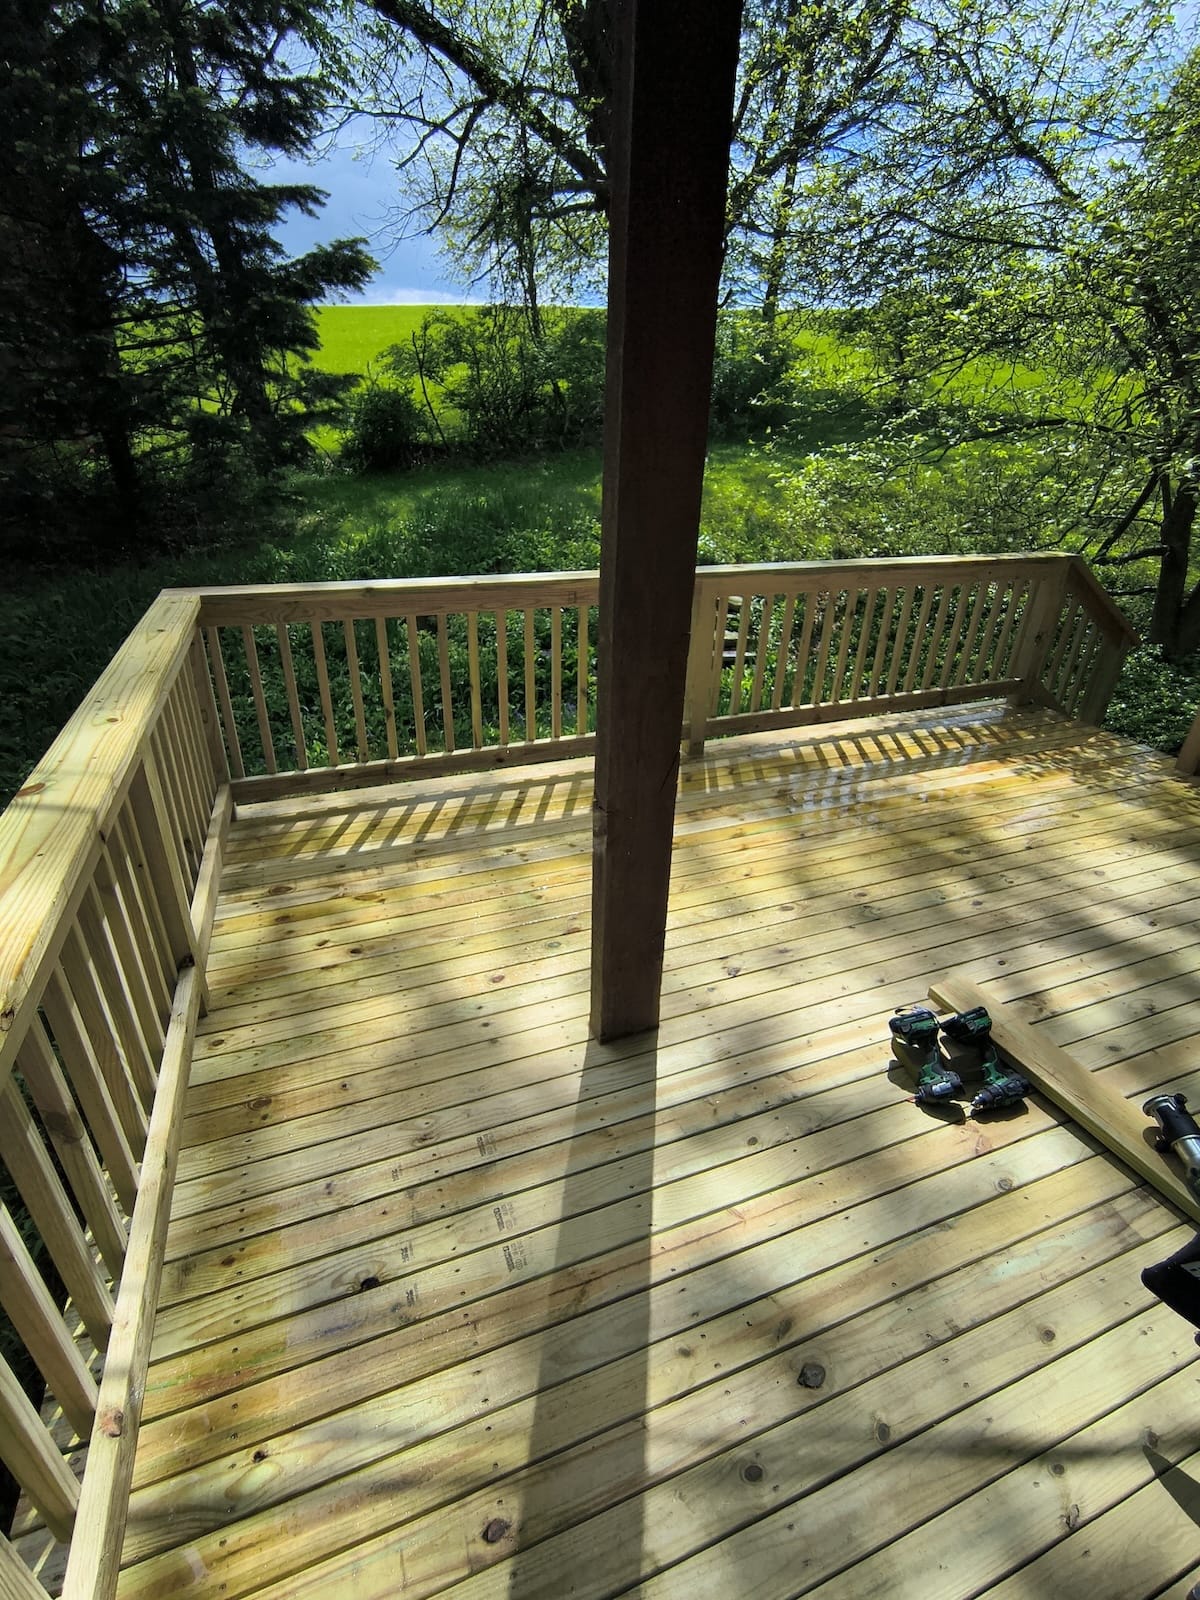
After the framing inspection was complete, we moved on to decking. This project scope was for standard Pressure Treated decking, which offers a great economical choice that can last when maintained properly. Pressure treated decking has gotten a bad wrap over the last decade, and some of that reputation is warranted, but we still feel like pressure treated decking is a product that can deliver strong function decks for homeowners when installed properly. Here are some of the key rules when we install pressure treated lumber:
All Decking should be screwed with properly coated deck screws. We like GRK Elite Deck Screws for our decks, but there are other good options out there. The coating is key to resist deterioration from the chemicals in the treated lumber.
Your Decking should be installed with gaps, or gaps in mind. The internet is a great resource, but this one mistake can leave you with a deck frame and deck surface that holds more water than it should. 5/4 x 6 Treated Decking is milled at 5-1/2" inches, then it is pressure treated with water and chemicals to make it last outdoors. When the lumber is treated, some boards swell more than others after absorbing so much water. The issue is, this swelling isn't uniform, so you can't treat each treated deck board as the same. The best way to ensure you have proper gaps when your deck dries out is to adjust gap spacing based on the width of the board at install. Here is our rough guide when installing 5/4 x 6 pressure treated decking.
Note: This can be very frustrating for people looking for perfect gaps in their deck boards at the time of installation, so we clarify this with customers that choose to use PT lumber. If you are looking for perfect decking board gaps, then you need to select decking that is kiln-dried or a synthetic decking that offers more uniformity.
Deck Board width at time of install:
5.5" - Leave gap on both sides (1/8") - This board will have minimal or no shrinking.
5.625" - Leave a smaller gap on both sides(1/16") - This board will shrink a bit over time.
5.75" - Install tight with no gap - This board will shrink up to a 1/4", leaving your 1/8" gap.
Stagger joints, and double up joists that are at a seam to avoid issues at seams when deck boards shrink.
The wood needs to be protected from the sun with a penetrating stain product. Avoid paint, stain is easier to maintain, simple re-apply it each season and your deck will last much longer than if left exposed to the elements. Wait until the wood is dry enough for your particular product and keep up with it, prioritizing the horizontal surfaces or the ones with southern exposure to be stained every year or other year.
This project started out as a safety concern with the existing deck structure failing, but it turned into a great new functional outdoor space for the homeowner to enjoy for years to come.