TimberTech Advanced PVC Deck Replacement with Custom Grill Bump-Out in Warwick, NY
This Warwick, NY deck replacement project involved demolition and removal of an existing deck, installation of new 24" diameter concrete footings at 42" frost depth, and construction of a durable structural frame using 6x6 posts, a triple 2x10 beam, and 2x8 joists spaced 12" on center. The design included custom ladder framing for a picture frame border and breaker board layout, along with a dedicated grill bump-out for improved outdoor cooking functionality. The finished deck features TimberTech Advanced PVC decking installed with the Cortex hidden plug system to improve long-term stability and reduce decking movement. Additional upgrades included TimberTech composite railings with a drink rail and integrated stair riser lighting for enhanced safety and appearance. Throughout the project, the team overcame several site-specific challenges, including working around an existing septic tank, managing PVC decking expansion and contraction, resolving railing sleeve scuffing, and navigating supplier delivery issues. The result is a low-maintenance, high-performance outdoor living space built for long-term durability in Orange County, NY.
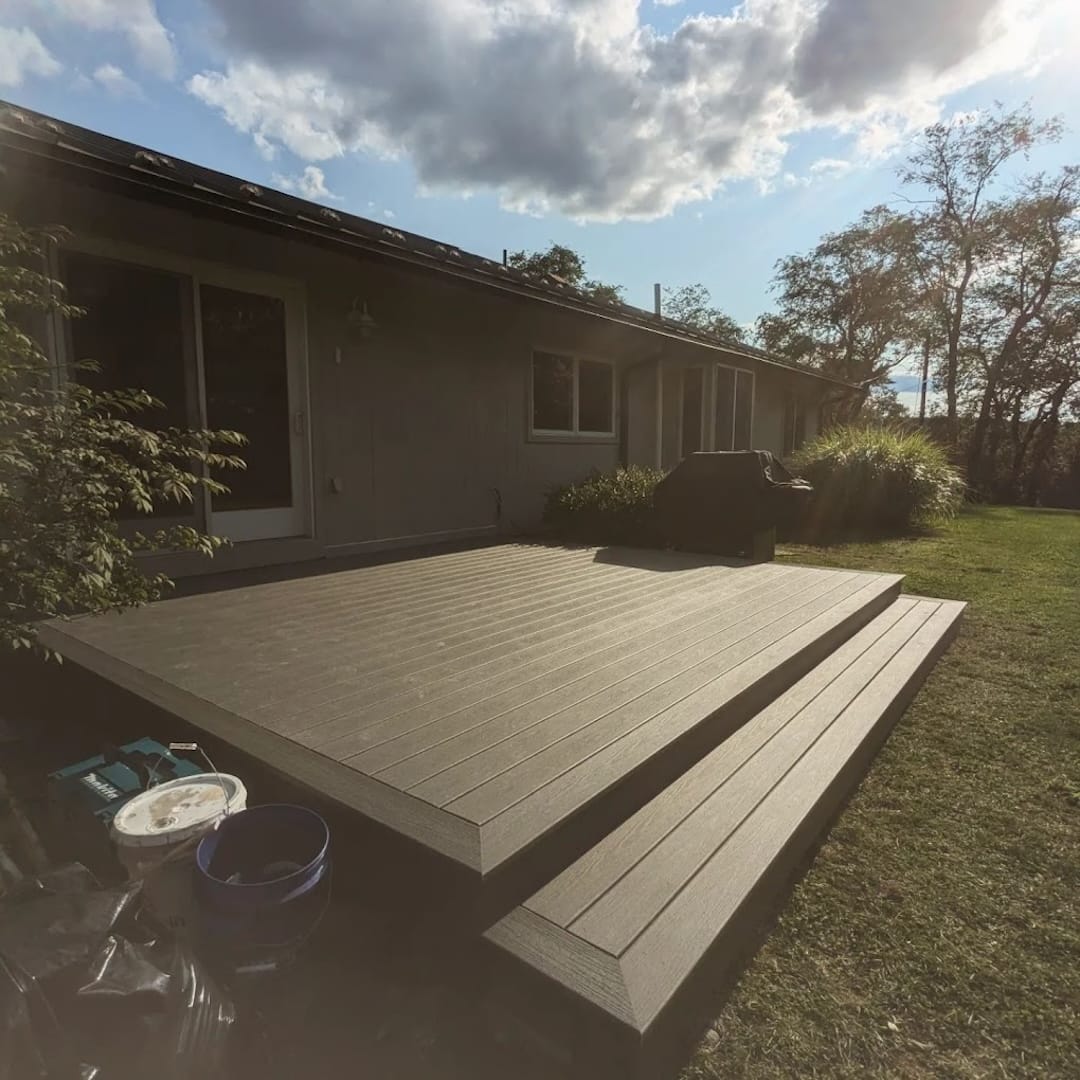
New TimberTech Advanced PVC Deck Replacement in Warwick, NY
Complete Deck Demolition and New Deck Construction in Warwick
We recently completed a full deck replacement project in Warwick, NY, transforming an aging deck into a low-maintenance outdoor living space built to last for decades.
The project involved complete demolition of the existing deck, new foundation work, custom framing modifications, TimberTech Advanced PVC decking, composite railings, stair lighting, and a custom grill bump-out designed specifically for the homeowner's outdoor cooking area.
The finished deck measures approximately 28' x 12' and was constructed according to IRC specs and local building codes.
Phase 1: Design & Planning
Every successful deck project starts long before excavation begins.
For this project, we developed a complete deck design that balanced structural requirements, aesthetics, functionality, and budget. The homeowners wanted a dedicated grilling area, upgraded lighting, and a premium low-maintenance decking system.
The final design included:
28' x 12' deck footprint
Custom grill bump-out
Picture frame border
Breaker board layout
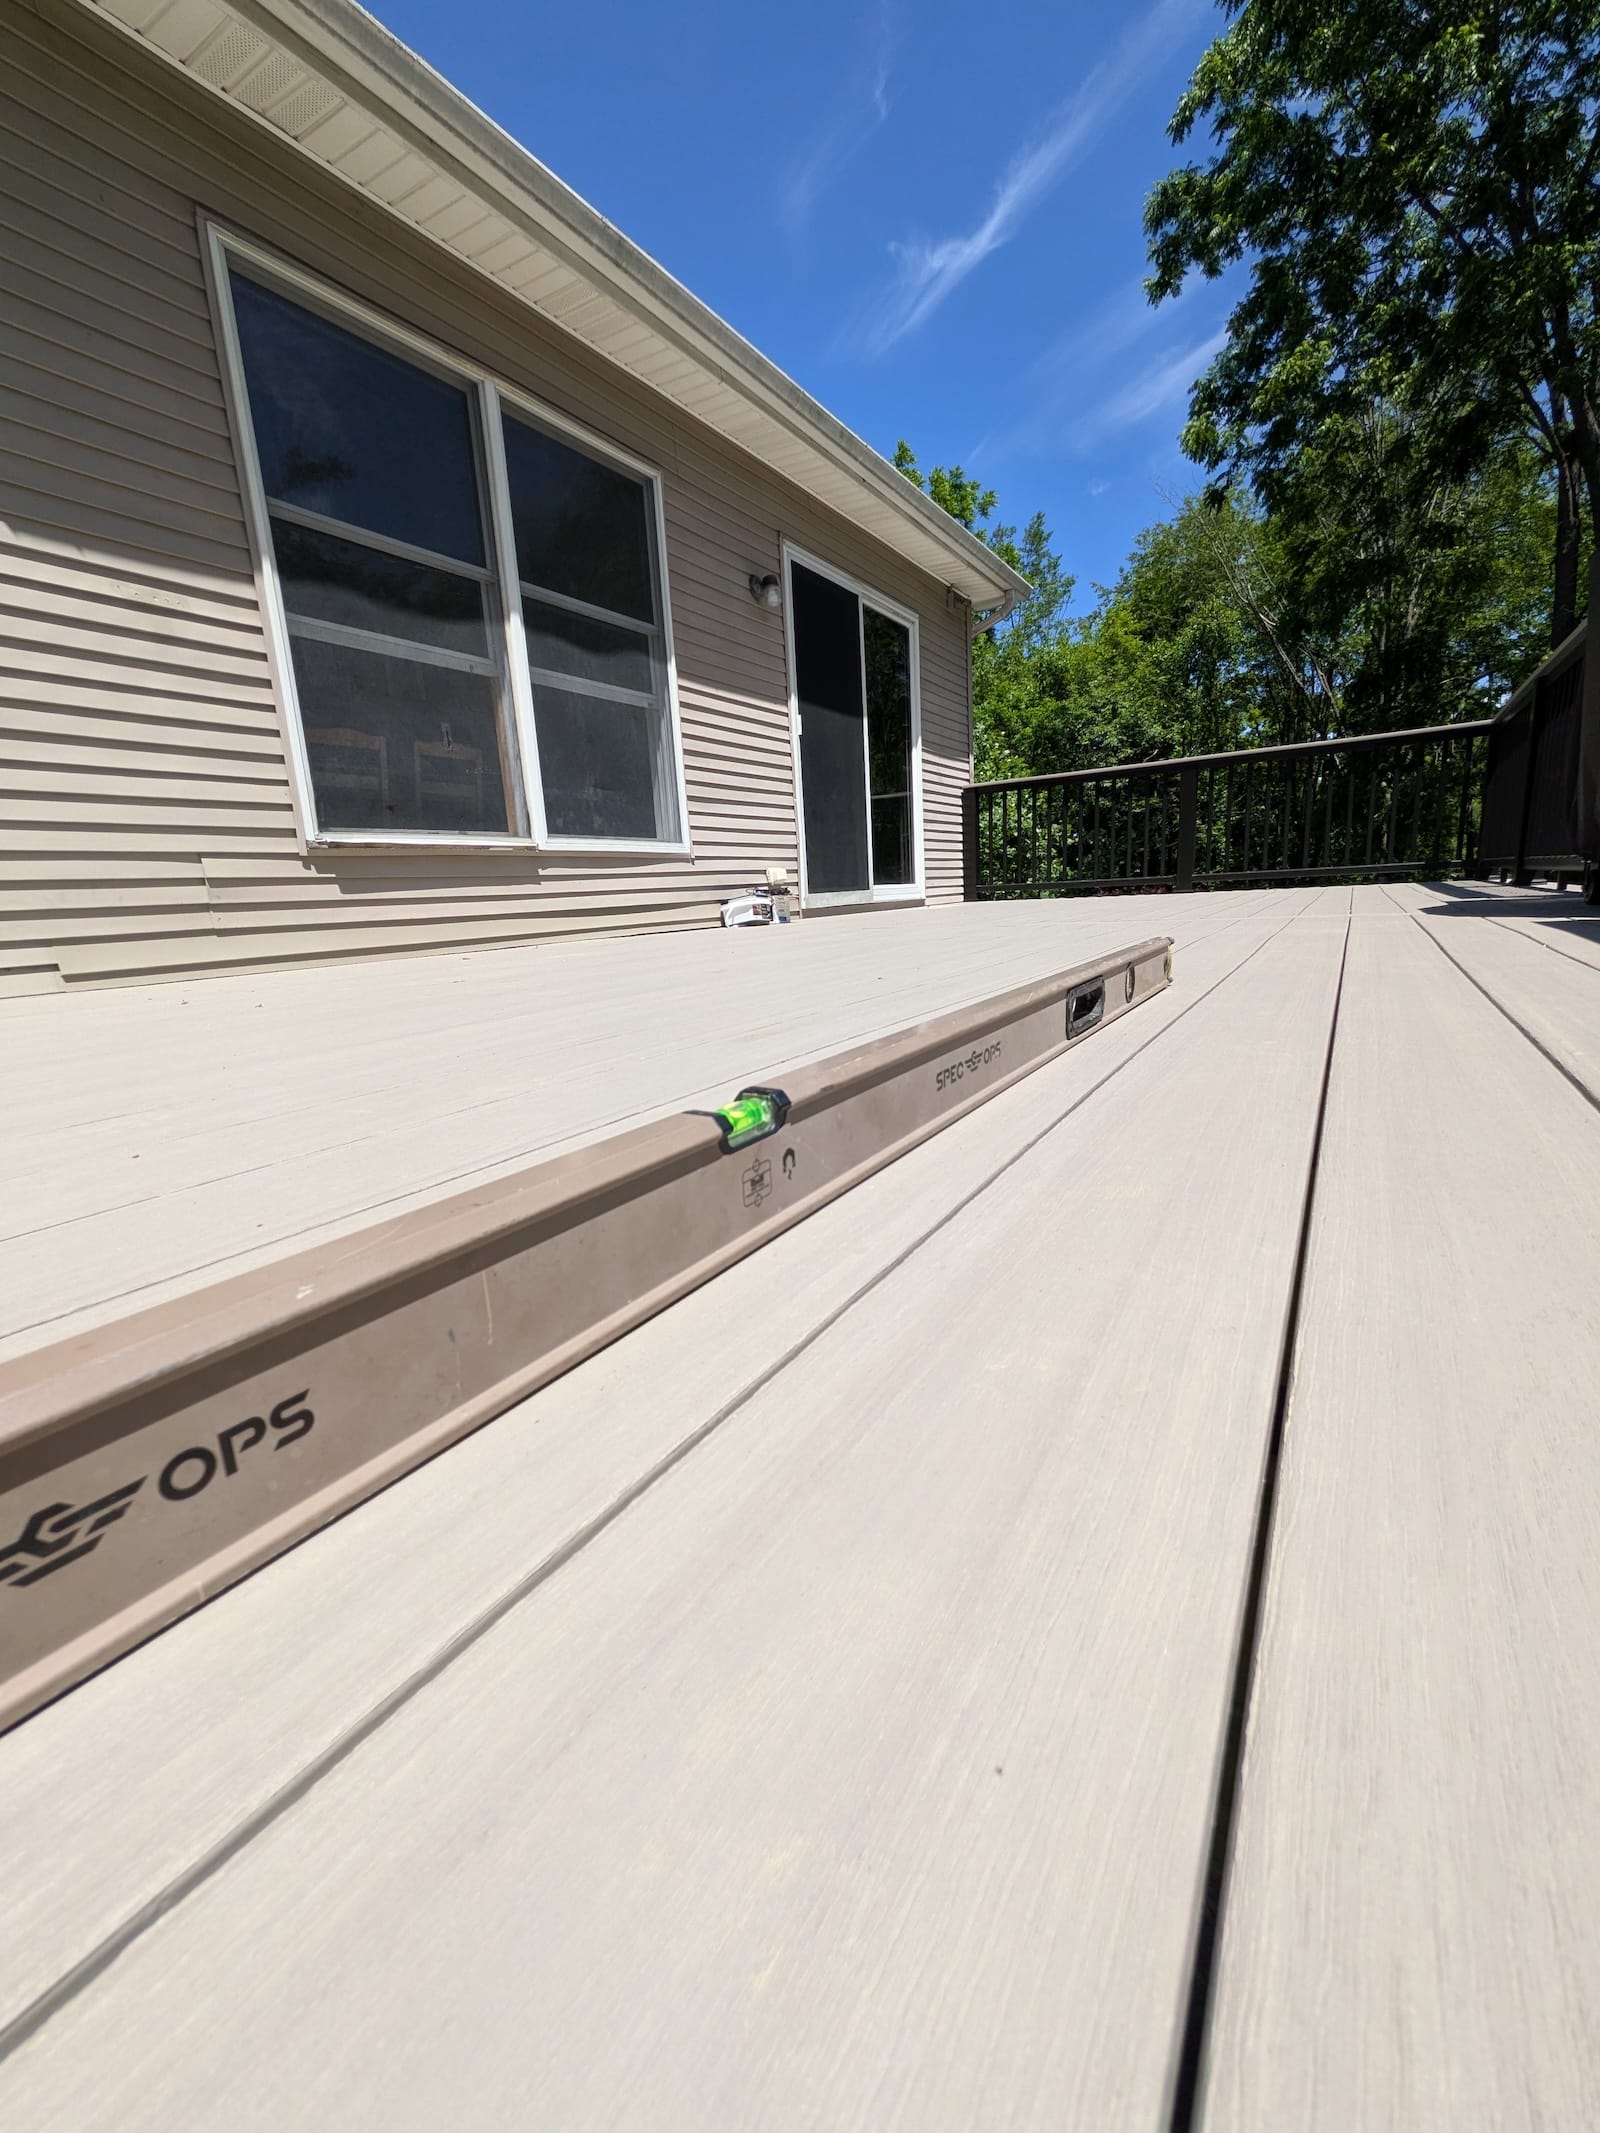
TimberTech Advanced PVC decking
Composite railings with drink rail
Integrated stair lighting
Engineered framing and footing layout
Detailed construction plans were prepared to ensure all structural components met code requirements and site conditions.
Plans worked up for the new proposed deck
Phase 2: Demolition and Site Preparation
The first step was removing the existing deck structure.
Since the existing deck lacked lateral bracing, we attached some temporary lateral bracing by securing 2x4s between the posts and the beam to keep things stable as we removed sections of the deck. We also installed bracing under the joists because there was no blocking, which would prevent the joists from rolling as we demo'd the deck. These steps aren't always necessary, but with the deck being about 8' off the ground at one section, we wanted to limit any possible surprises.
We install some temporary bracing during demolition to prevent movement of the beam/post assembly and rolling of the joists.
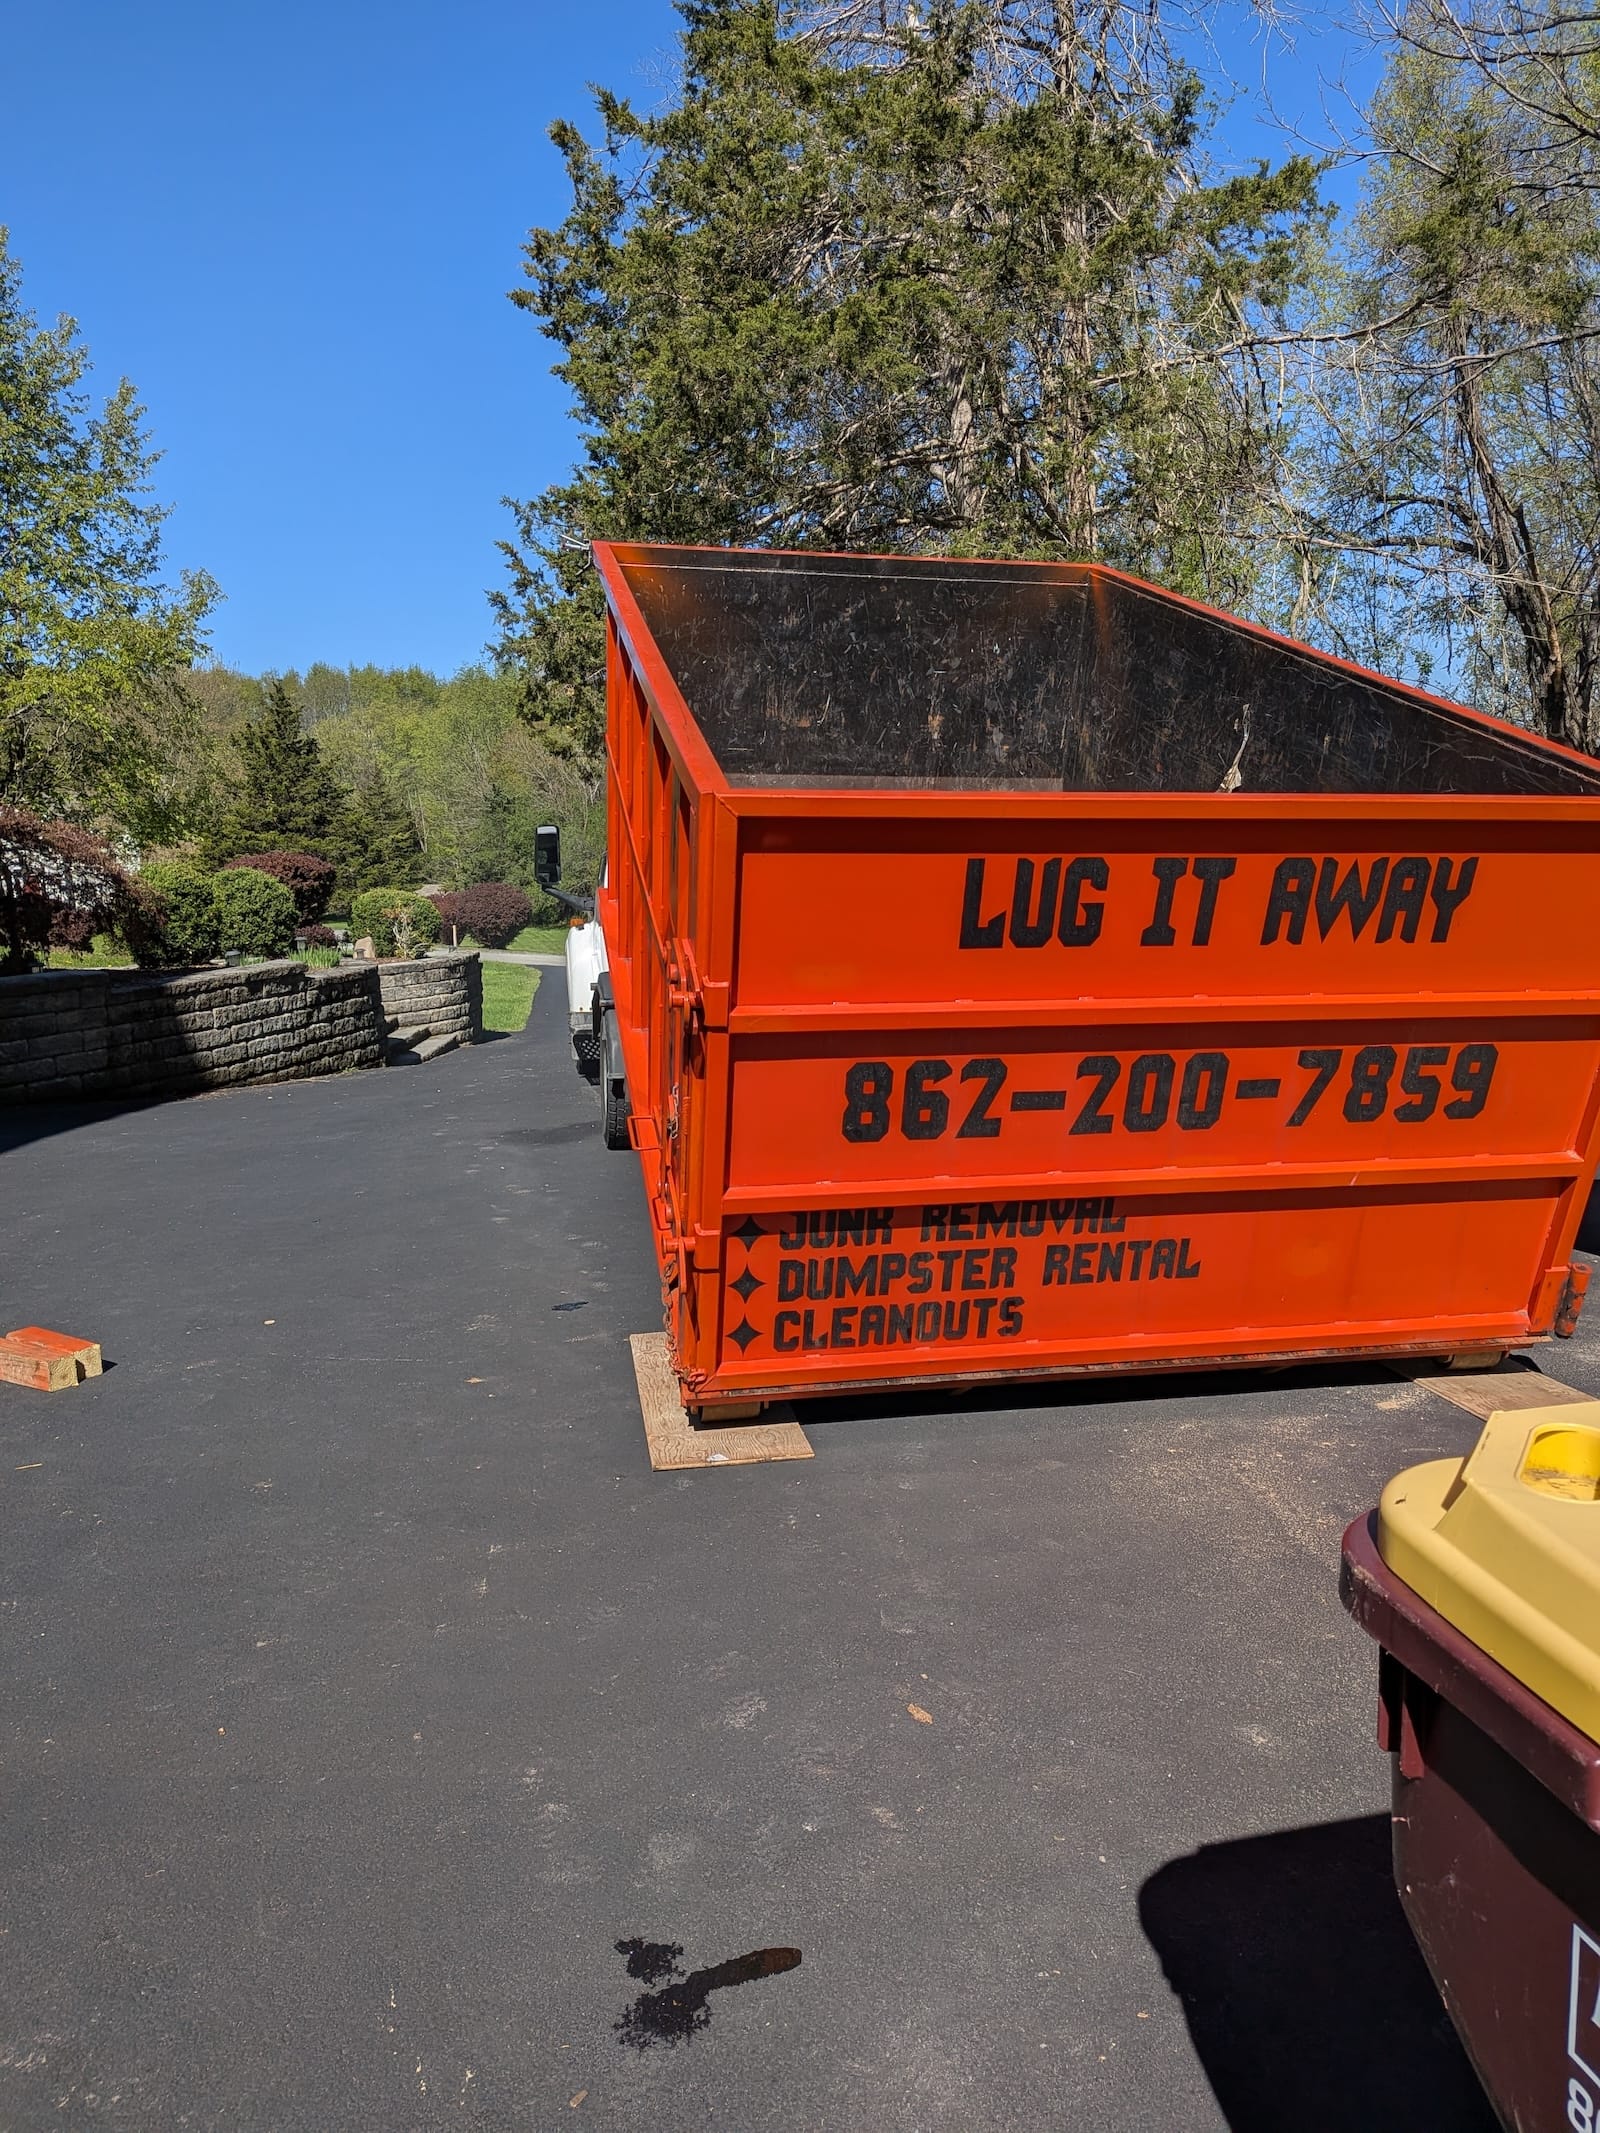
We completed the entire demolition and disposal process in a single day using a dumpster on-site, allowing us to quickly prepare the area for ledger and footing work
After Day 1, old deck is gone and site is ready for new deck work to begin. We install tyvek over the old ledger area to keep it protected before construction begins.
Although the previous deck ledger was flashed, there was still some dryrot/water damage to sections underneath the ledger where the sliding door was installed.
Lug it away is our go-to for dumpster rentals. Jimmy is great and helps us get dumpsters in and out without much fuss.
Phase 3: Footings
A deck is only as strong as the foundation supporting it.
For this project, we installed:
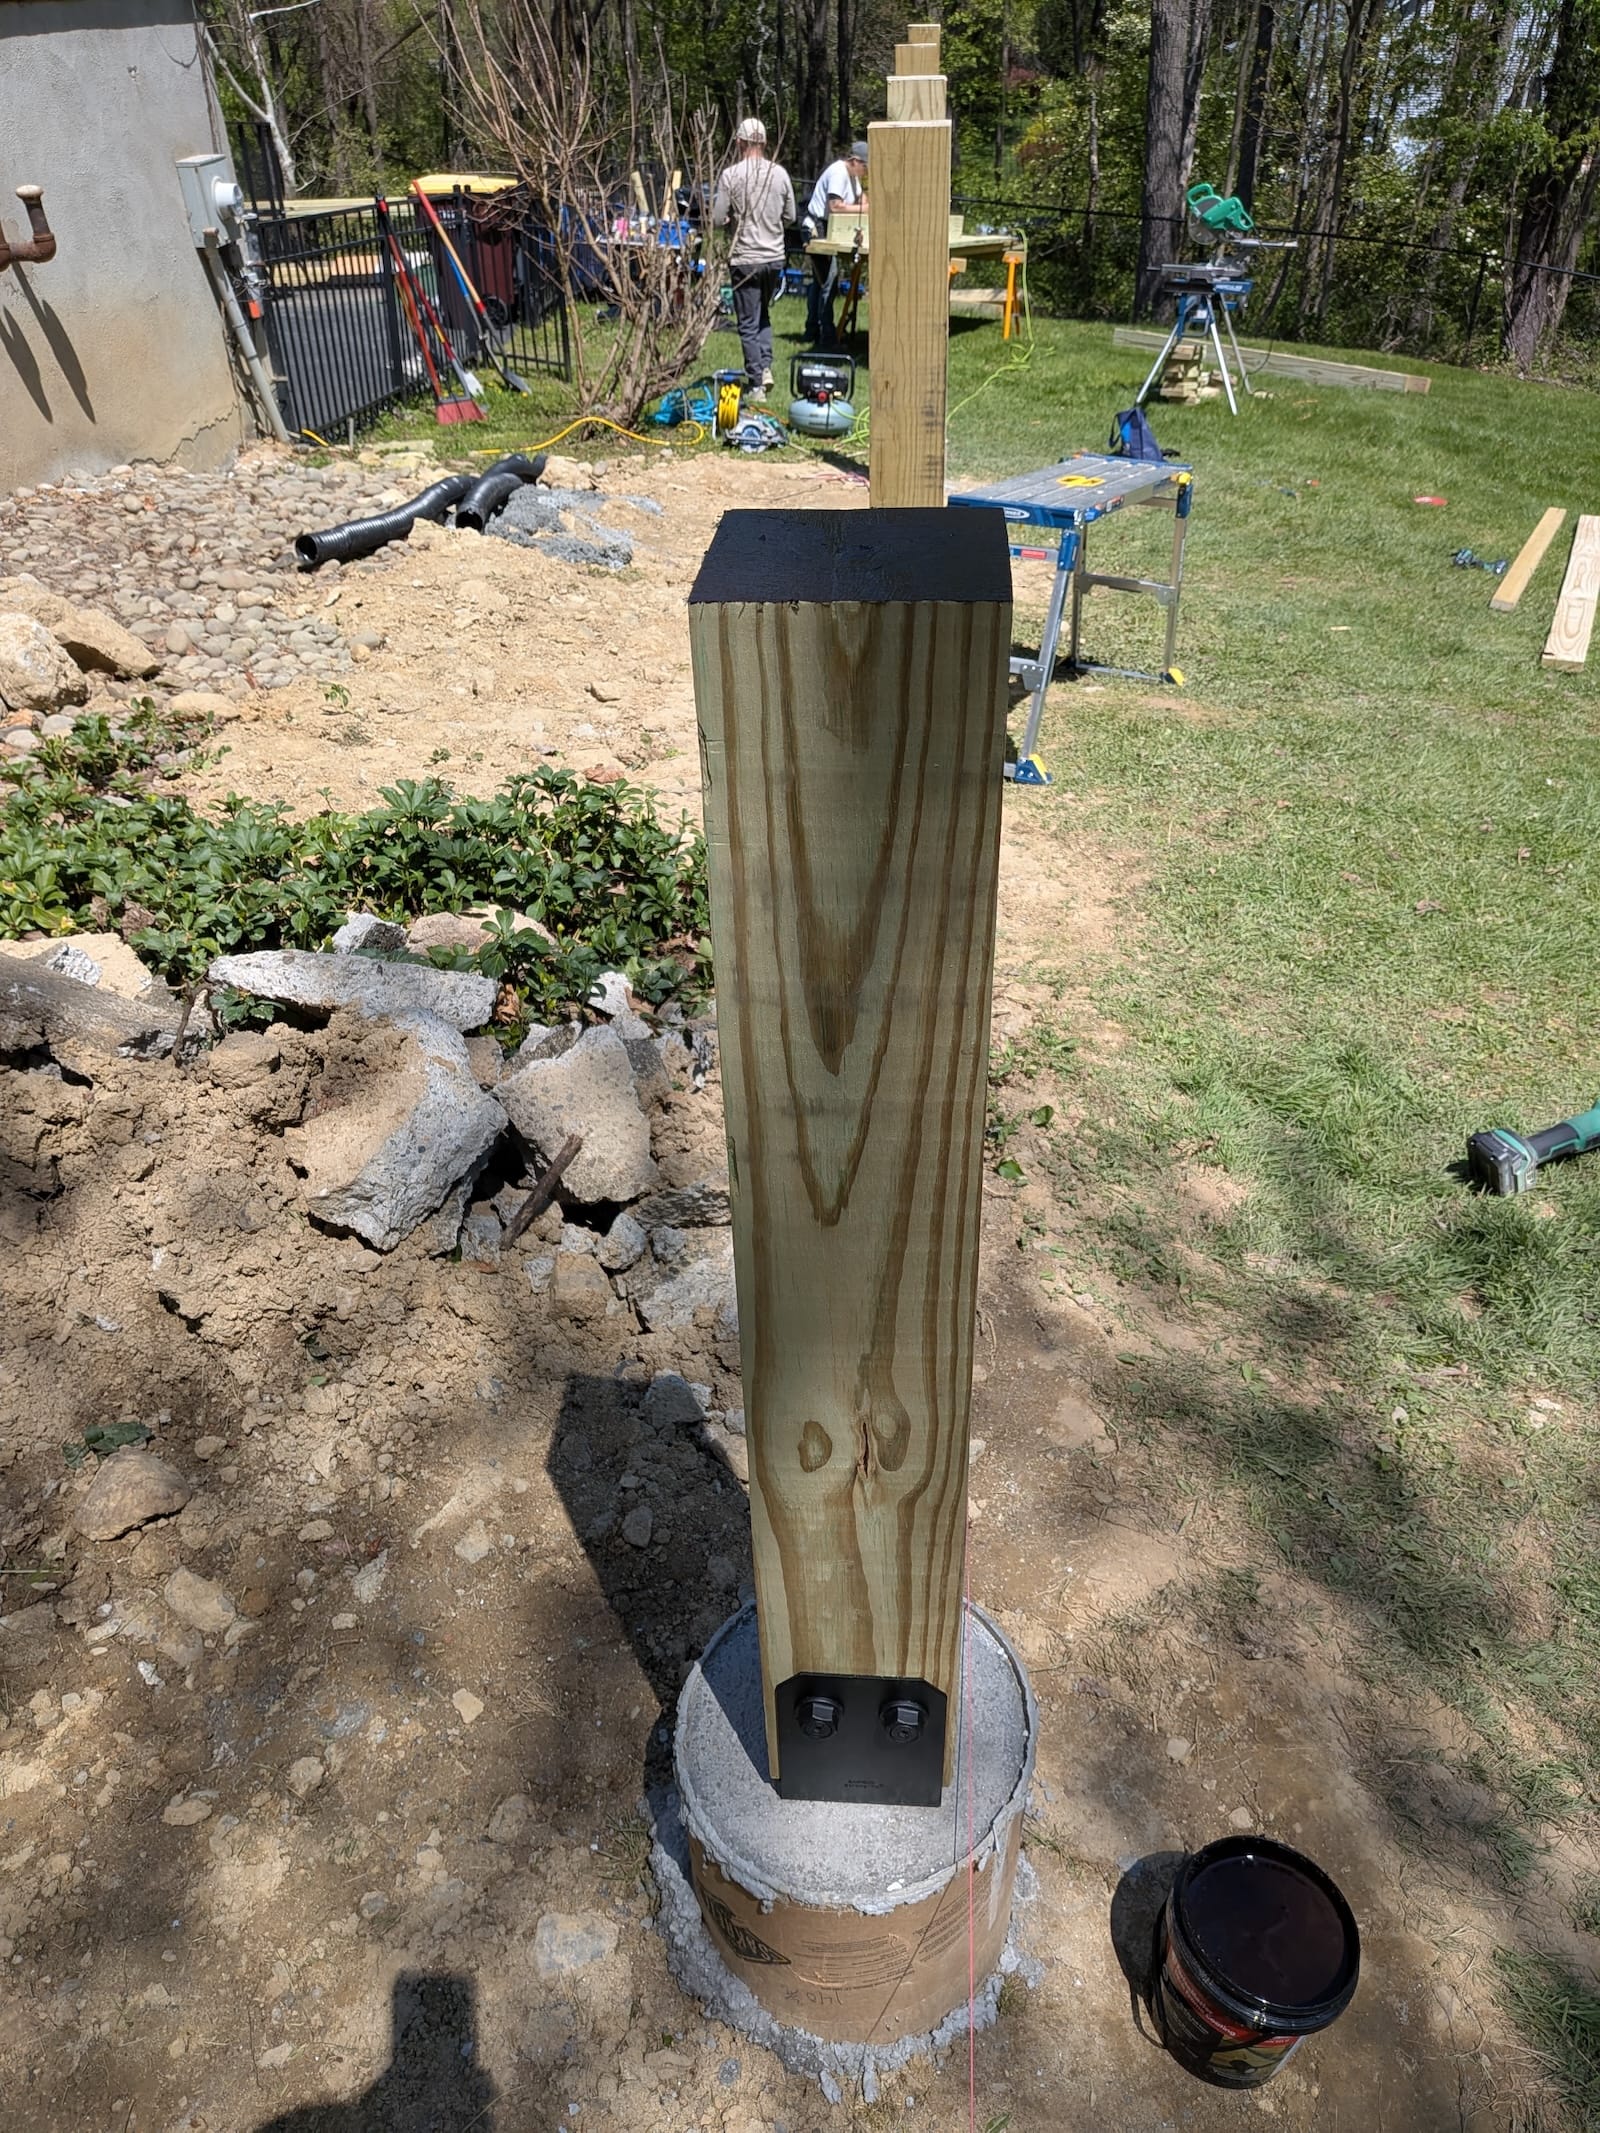
24" diameter concrete footings with 12" diameter concrete piers extending from 42" up above grade. This bell shape design for footings ensures proper load transfer to the soils below frost depth and helps prevent sinking which is common when pouring footings that are simply columns, without a wider footing below.
Only photo I have of footings, but this is setting the posts onto the footing hardware after letting the concrete cure for 4 days.
During excavation, we discovered one planned footing location was positioned too close to an existing septic tank.
Rather than compromising the septic system, we modified the footing layout and adjusted the structural beam design to accommodate the revised span requirements. This moved our deck from a double 2x10 beam to a triple 2x10 beam. Not much extra work for a more robust beam at the end of the day.
These types of field adjustments are common on experienced deck projects and help prevent future issues while maintaining a safe structure.
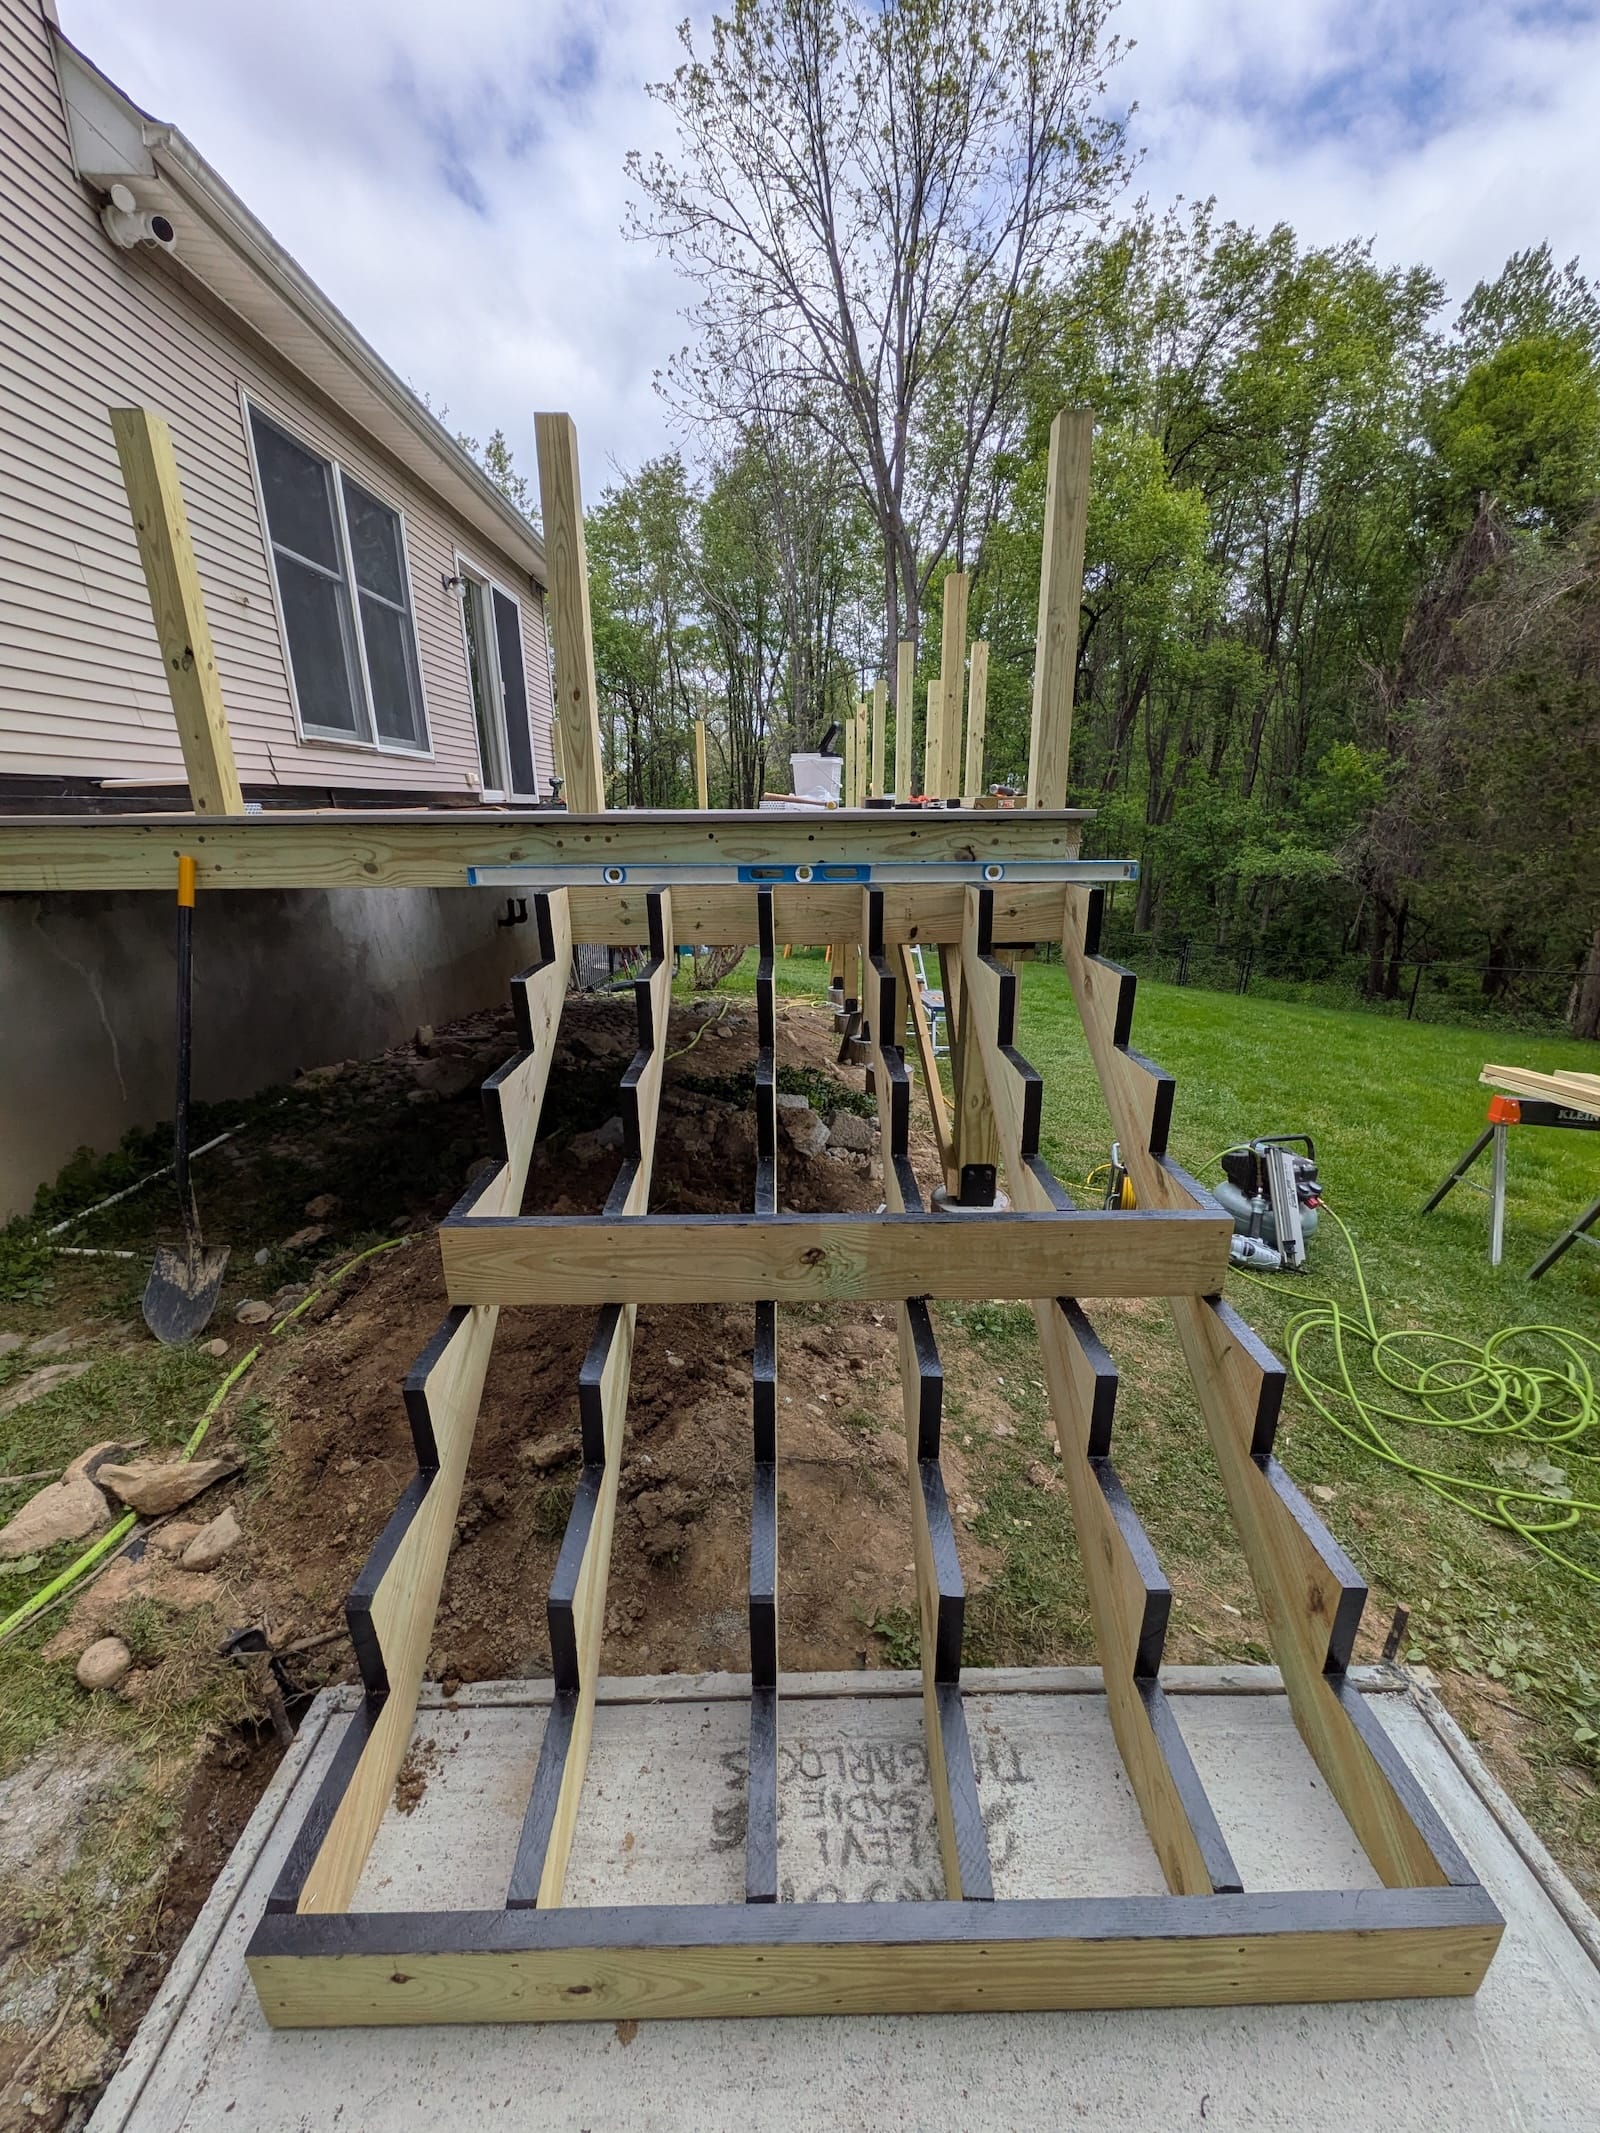
Phase 4: Framing
With the footings complete, we moved into structural framing.
The deck frame was designed for long-term strength, rigidity, and reduced movement.
Framing included:
Properly flashed ledger board, with LedgerLok screw attachment
Triple 2x10 beam assembly
6x6 support posts
2x8 floor joists at 12" on-center
Simpson structural connectors and hardware
Blocking installed mid-span and at the beam
3 Ladder frames to carry picture frame and breaker board.
The tighter 12" on-center joist spacing helps create a more solid walking surface while providing superior support for the PVC decking system.
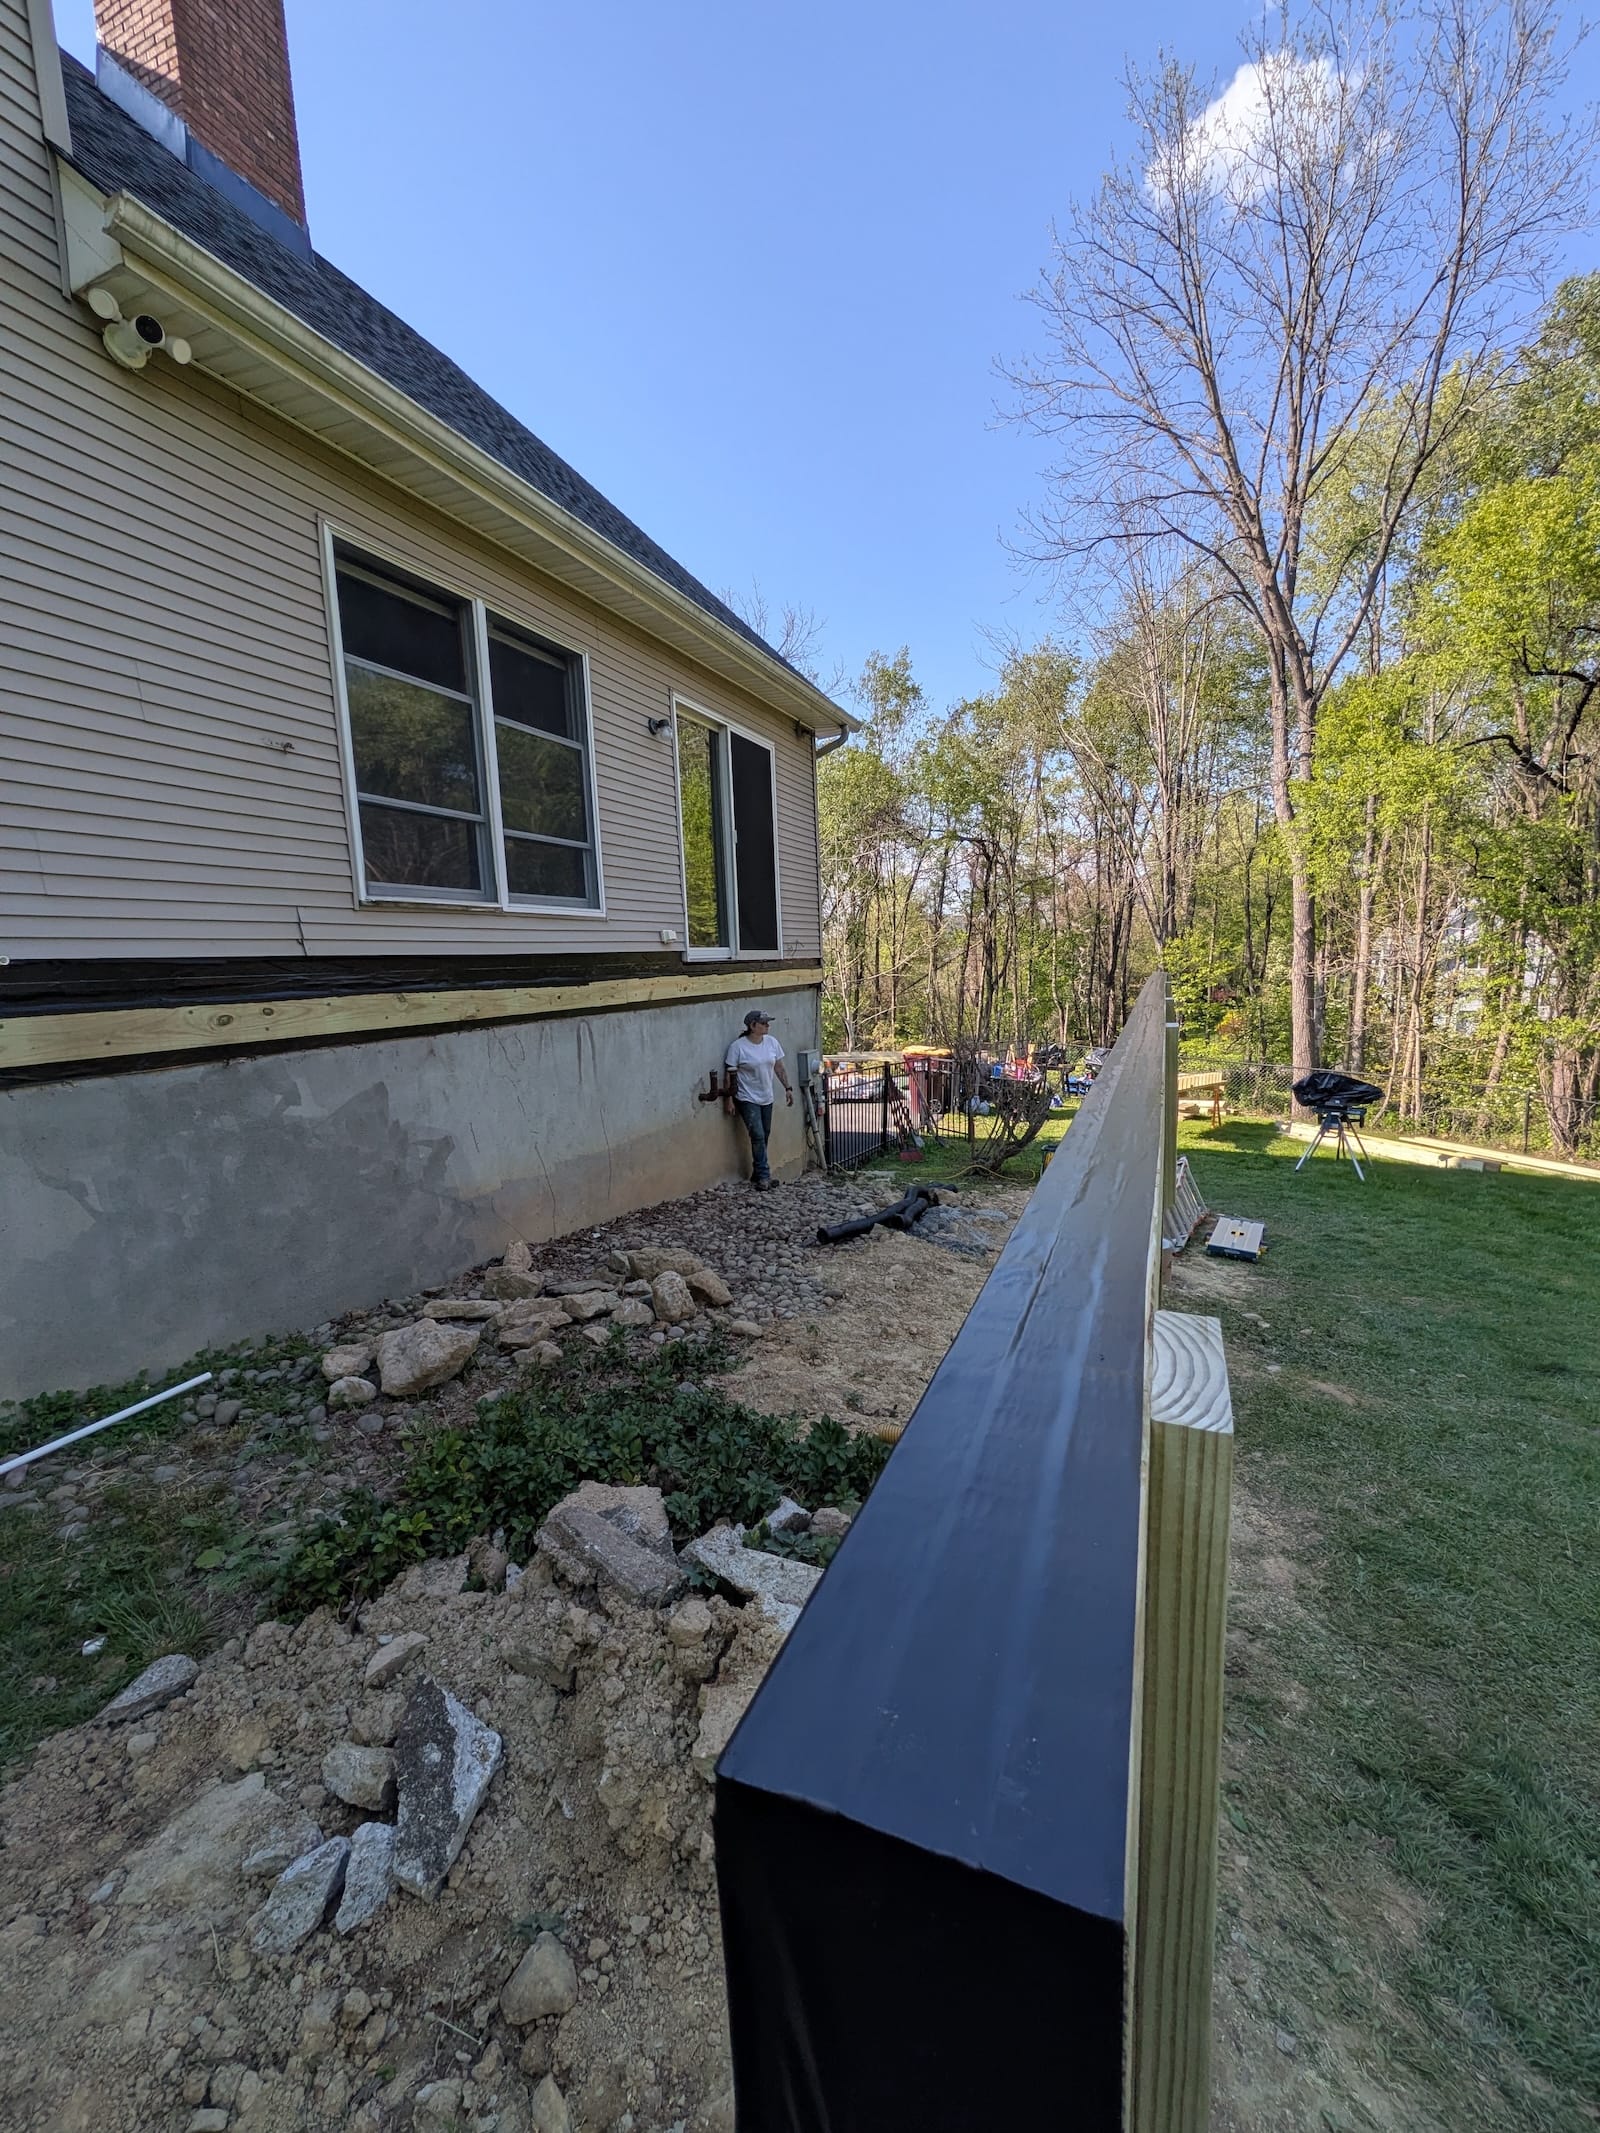
Our Ledger and Beam assembly taped and ready for framing
We also had to install the bump out framing for the grill. This section was cantilevered over the beam, but only 2' since our local inspector prefers cantilevers to stay below 2' rather than running the "standard" 1' to 4' design when possible, which we agree is best practice.
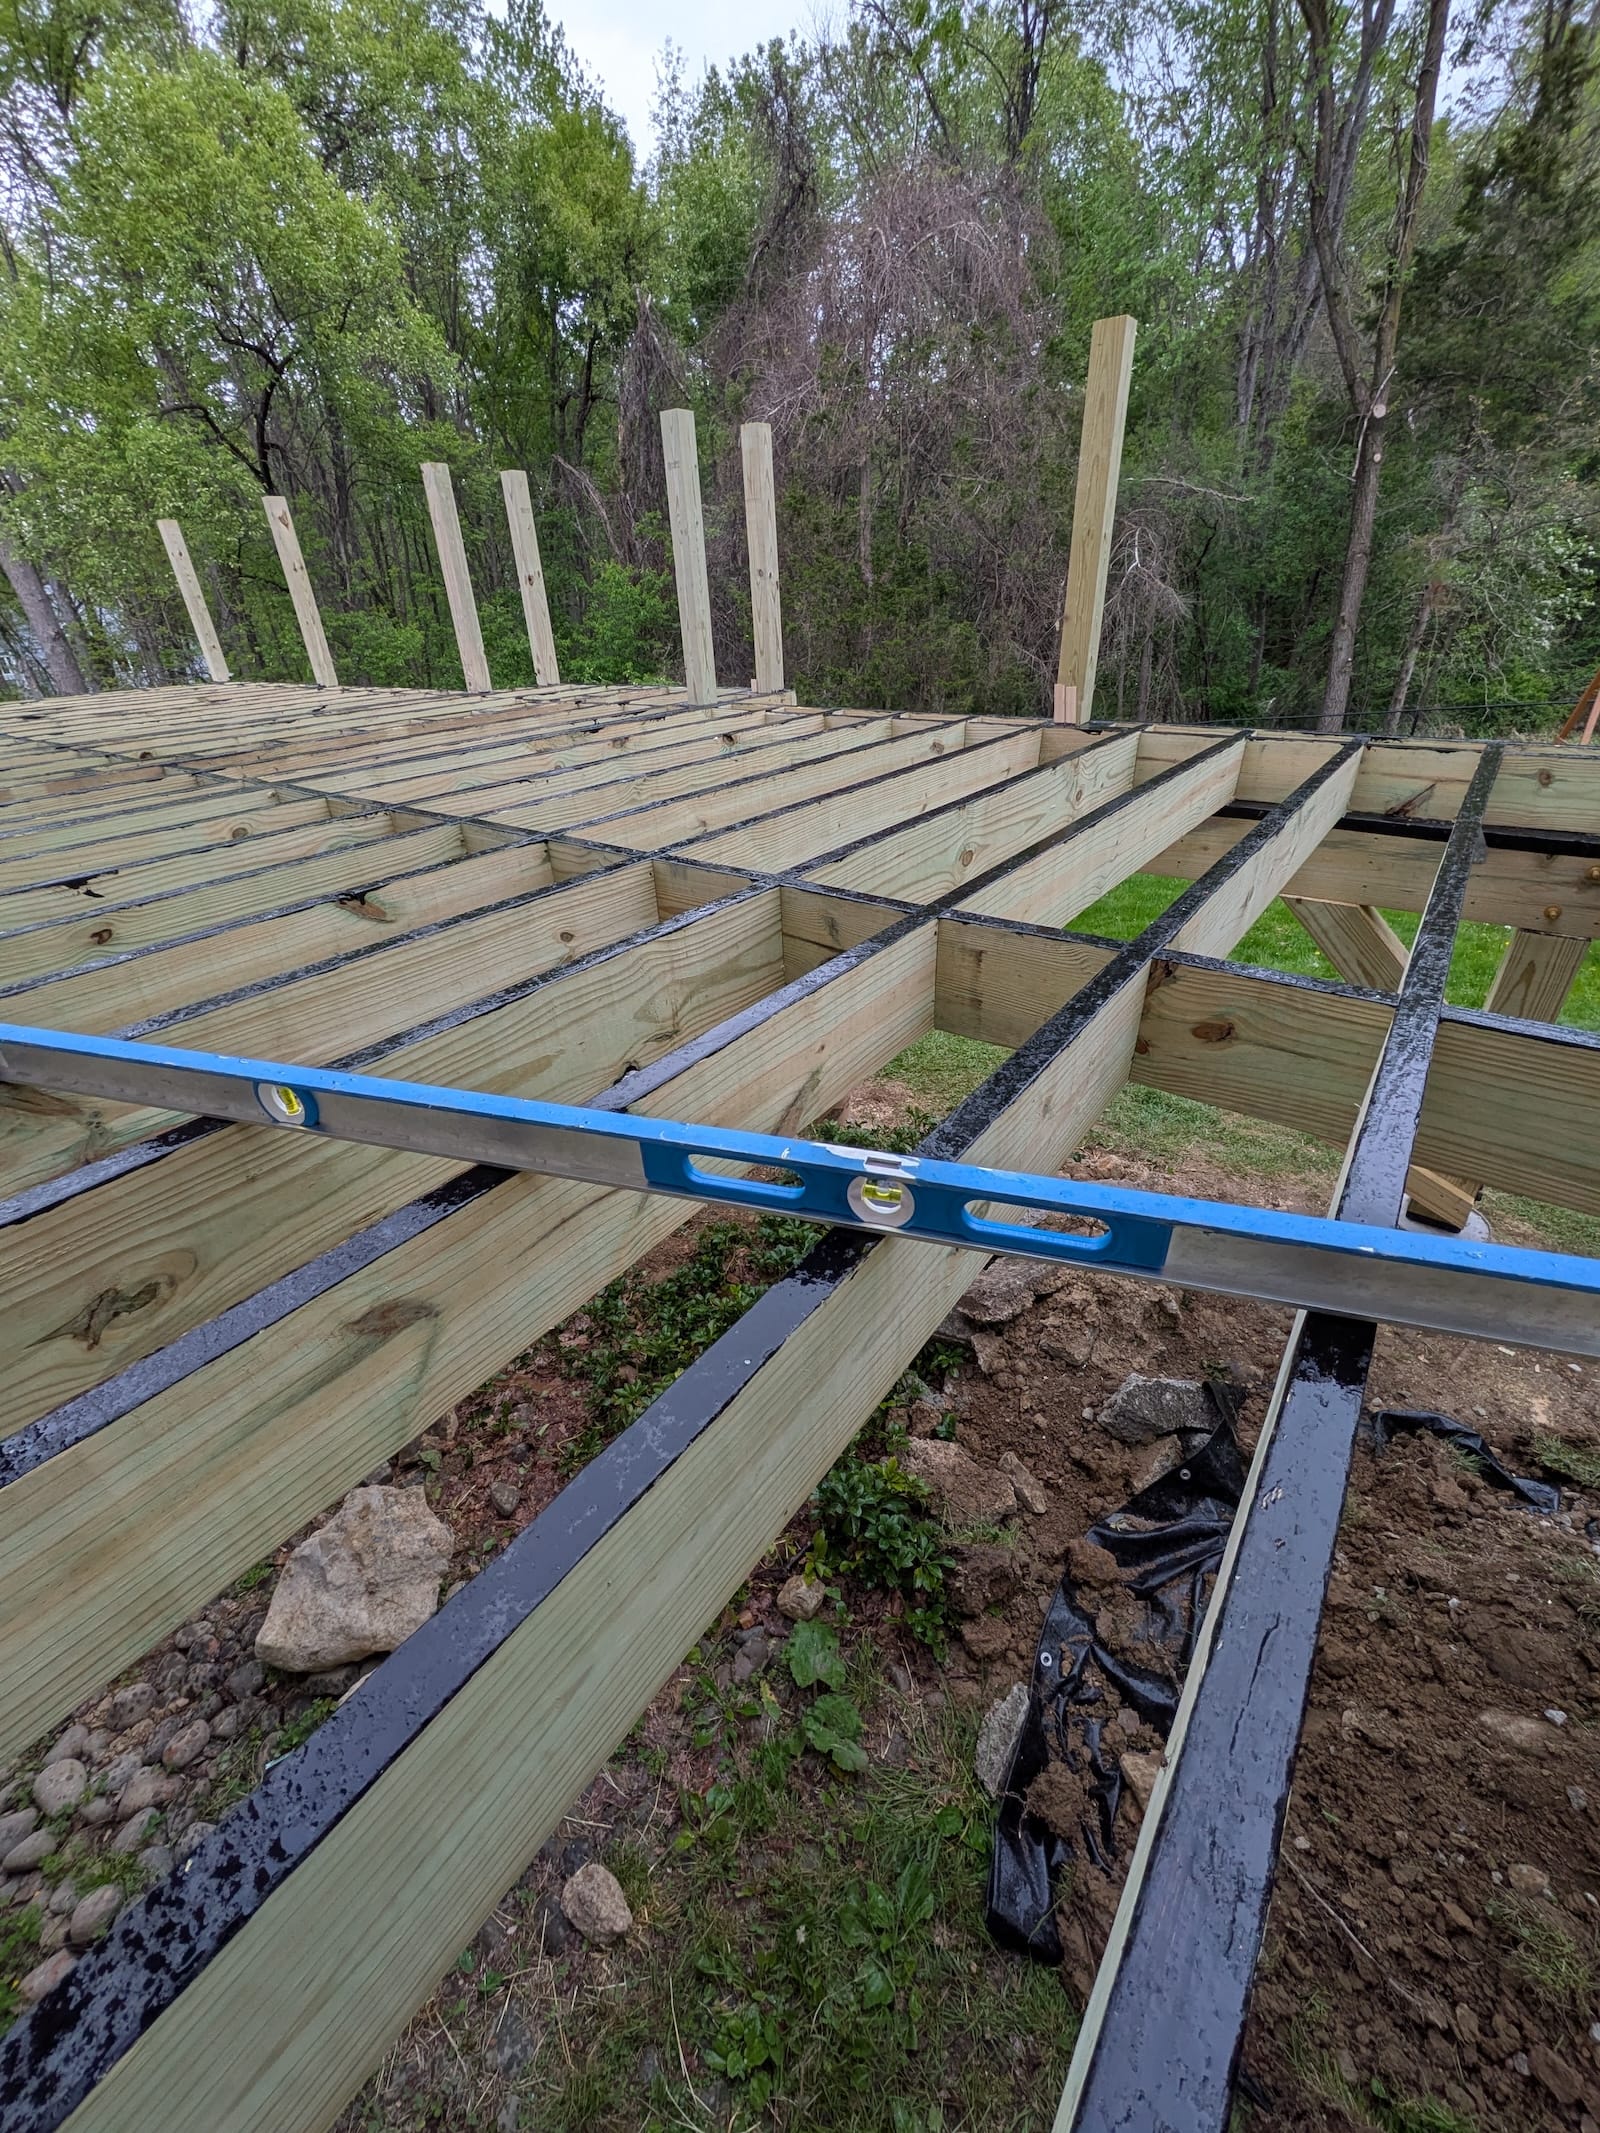
Deck Framing level check with blocking installed, and liquid flashing applied to top layer
Special attention was given to beam placement and load distribution after adjustments were made for the septic tank location.
Once the primary deck structure was completed, we framed the staircase and railing system.
This phase included:
Stair stringer layout and installation
Stair framing assembly
Landing preparation
Composite railing post framing
Drink rail support framing
The staircase was designed to provide comfortable access to the yard while maintaining a clean visual transition from the deck surface. We had to pour a new stair landing since the footprint of this deck expanded and moved the location of the staircase landing location.
Staircase framing stringer setup that we preassemble before hanging off the band joist with a drop header. We like using the liquid flashing from Fastenmaster on stair stringers since it does better with the corners than tape, and is where we find rot on more tear-outs.
Proper post blocking and reinforcement were installed throughout the railing system to ensure long-term structural stability. We do this using a combination of 8" Simpson Structural screws and blocking so that the posts don't move.
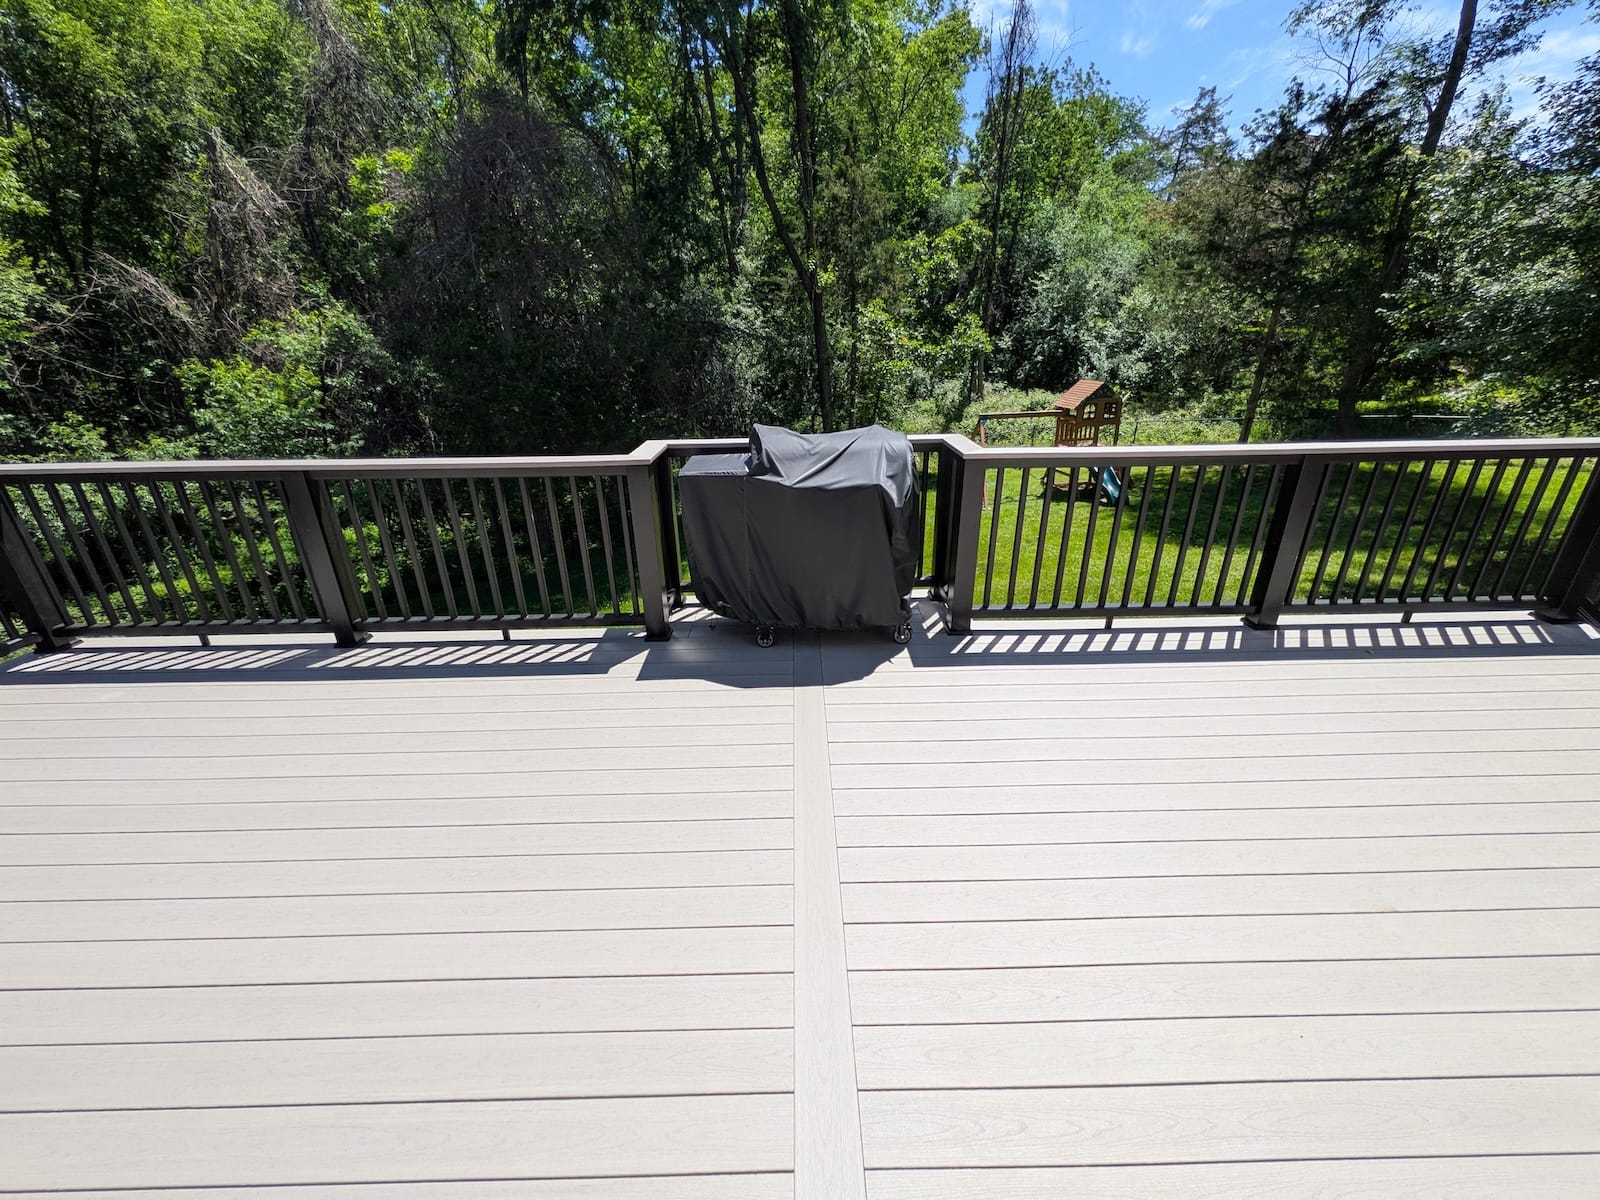
After completing the decking surface, we installed the TimberTech composite railing system.
The railing package included:
Composite post sleeves
Black composite balusters
Composite top rail
Matching TimberTech drink rail
The drink rail provides additional functionality for entertaining while creating a finished, high-end appearance.
Timbertech Classic Composite Railings with Drink Rail
During installation, we encountered minor scuff marks on several composite post sleeves.
Upon closer inspection, we determined the marks were actually composite material deposits transferred from railing components during handling.
Using a combination of Simple Green and Magic Eraser, we successfully removed the deposits and restored the sleeves to their original appearance.
Phase 8: Details & Cleanup
The final phase focused on completing the details that elevate the finished project.
This included:
Installation of stair riser lighting
Final fastener inspection
Deck surface cleaning
Railing cleanup
Site cleanup and material removal
Final quality control inspection
The new stair riser lights provide improved nighttime visibility while adding a subtle architectural accent to the staircase.
Once all details were completed, we did our quality checks to ensure all details and checklist items were taken care of.
Solving Installation Challenges
Every project presents challenges, and this one was no exception.
Challenge #1: Custom Grill Bump-Out
The homeowner wanted a dedicated grilling area incorporated into the design.
This required custom framing modifications and careful planning to ensure the bump-out looked intentional rather than added on as an afterthought.
Challenge #2: PVC Decking Movement
Throughout the installation process, the PVC decking experienced noticeable dimensional changes as temperatures fluctuated.
Maintaining consistent spacing and alignment required constant monitoring and adjustments during installation.
Challenge #3: Composite Rail Sleeve Scuffing
During railing installation, we noticed several scuff marks on the TimberTech post sleeves.
After investigation, we determined the marks weren't damage to the sleeves themselves. Small amounts of composite material from the railing components had transferred onto the sleeve surfaces and become embedded.
Using a combination of Simple Green and Magic Eraser, we were able to remove the deposits and restore the sleeves to their original appearance.
Challenge #4: Septic Tank Interference
One footing location conflicted with the existing septic system.
Rather than risk future issues, we relocated the footing and adjusted the beam sizing to accommodate the revised span requirements while maintaining structural performance.
Challenge #5: Material Logistics
This project was supplied through Lowe's in an effort to reduce overall material costs for the homeowner.
Unfortunately, the experience highlighted some of the challenges that can occur on larger projects when material logistics aren't properly coordinated.
We dealt with:
Unpredictable delivery scheduling
Missing materials
Customer service complications
Multiple follow-up orders
The most memorable delivery arrived at approximately 8:45 PM, which included all of our framing lumber.
While we always look for ways to save our customers money, this project reinforced the value of working with suppliers who specialize in contractor-grade service and reliable jobsite logistics.
Finished Result
The completed deck provides the homeowners with a durable, low-maintenance outdoor living space featuring:
TimberTech Advanced PVC decking
Custom grill bump-out
Picture-frame border
Breaker board detail
TimberTech composite railings
Drink rail system
Integrated stair lighting
Heavy-duty structural framing
Frost-protected foundation system
If you're considering a deck replacement in Warwick, NY or anywhere in Orange County, investing in proper foundations, quality framing, and premium decking materials can dramatically improve both the appearance and longevity of your outdoor living space.


.jpg)
